In the era of cloud computing, efficient data management is crucial for businesses of all sizes. Azure Blob Storage offers a scalable and cost-effective solution for storing unstructured data in the cloud. Leveraging the power of PowerShell, developers and system administrators can seamlessly automate the process of writing files to Azure Blob Storage. In this step-by-step guide, we’ll explore how to harness the capabilities of an Azure automation account runbook to effortlessly write files to Azure Blob Storage using PowerShell.
To skip directly to the Azure runbook PowerShell code section click here.
Jump to Section:
1. Create Azure storage account
2. Create Azure storage account container
3. Create new runbook
4. The code
5. Test runbook using Test pane
Write Files to Azure Blob Storage using PowerShell
Step 1 – Create Azure storage account
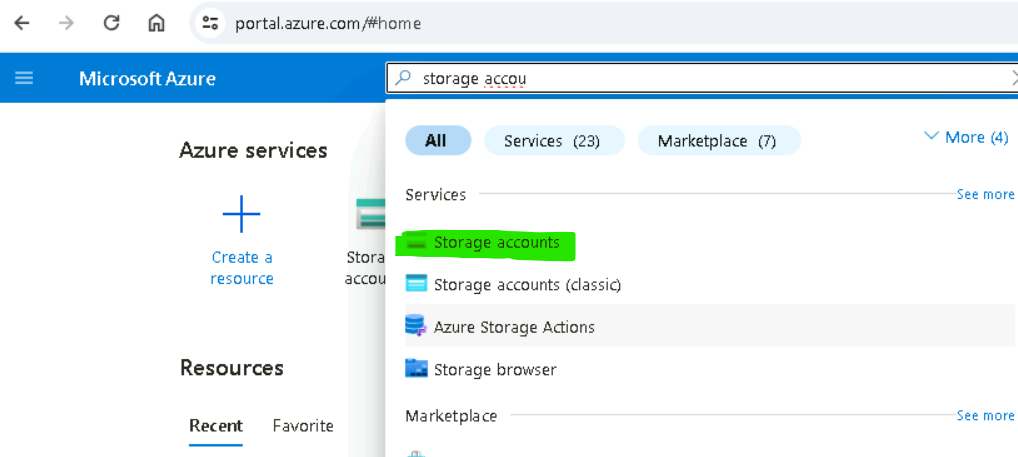
Navigate to Azure Portal and select Storage accounts.
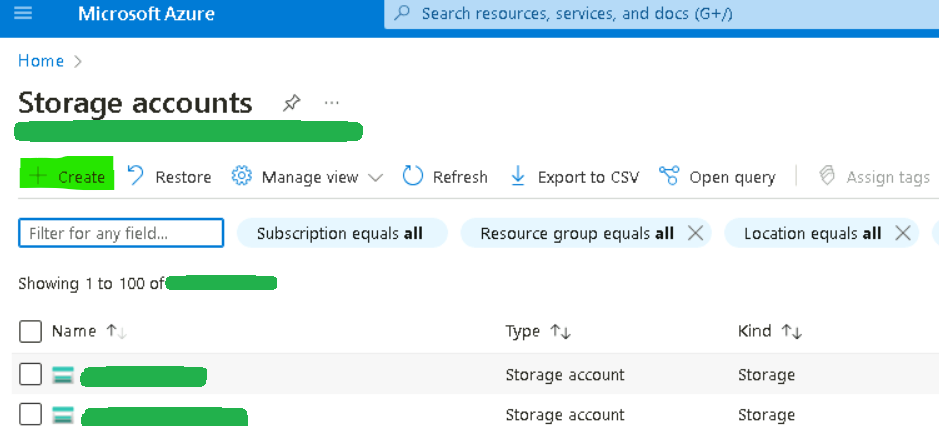
Click Create.
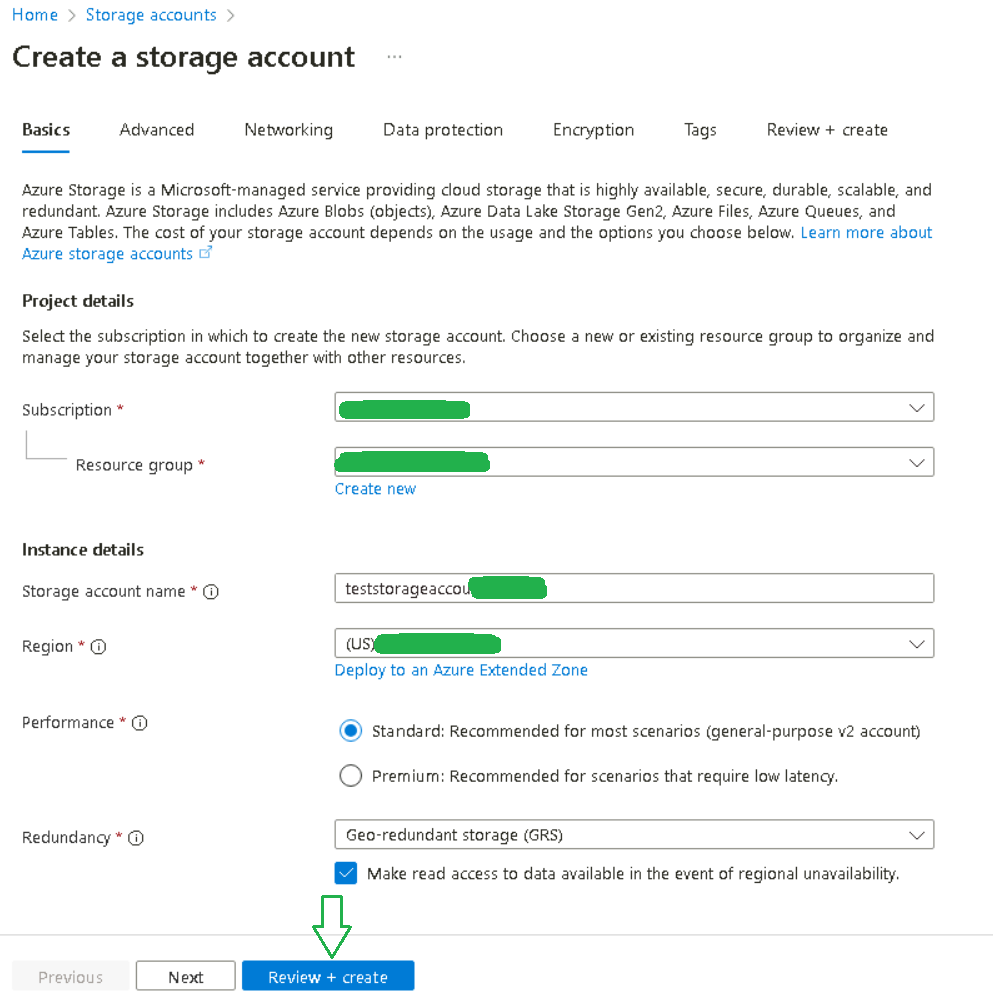
Enter the storage account details (i.e. subscription, resource group, name, region) and select ‘Review + Create‘.
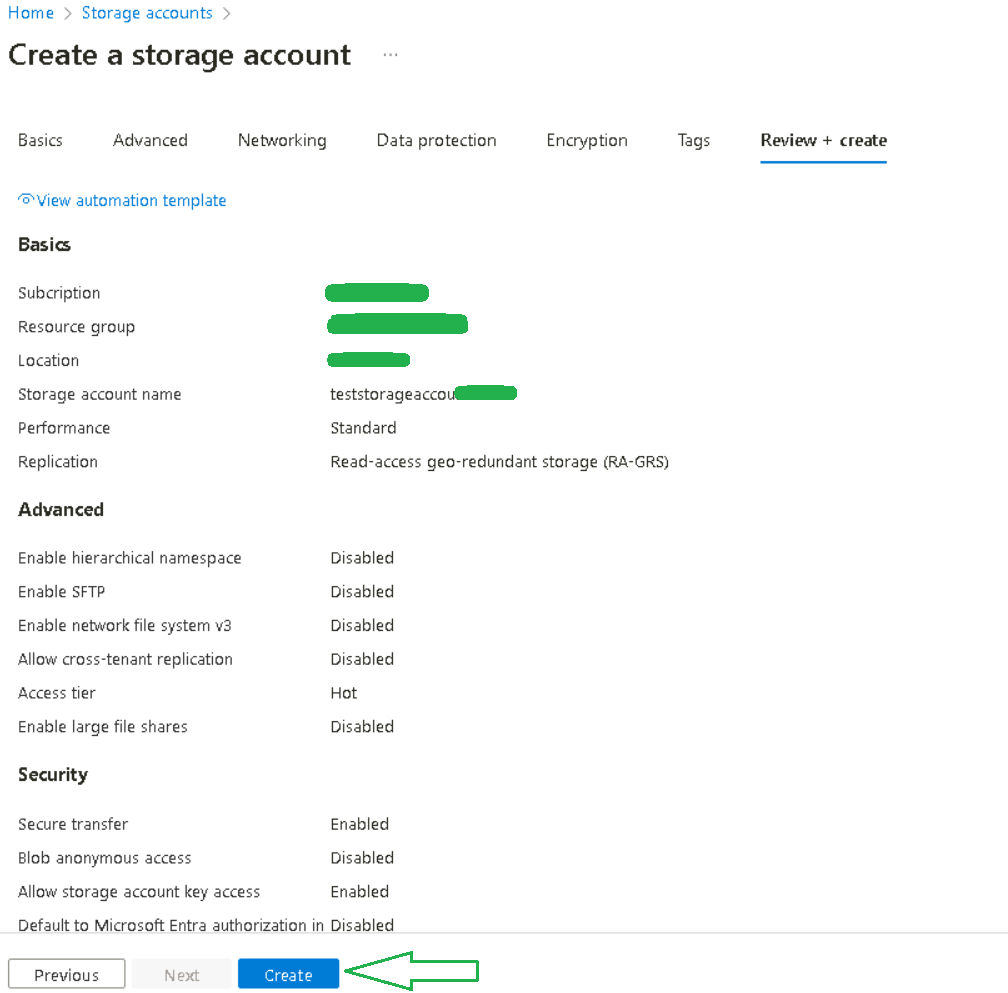
Click Create.
Select Go to resource.

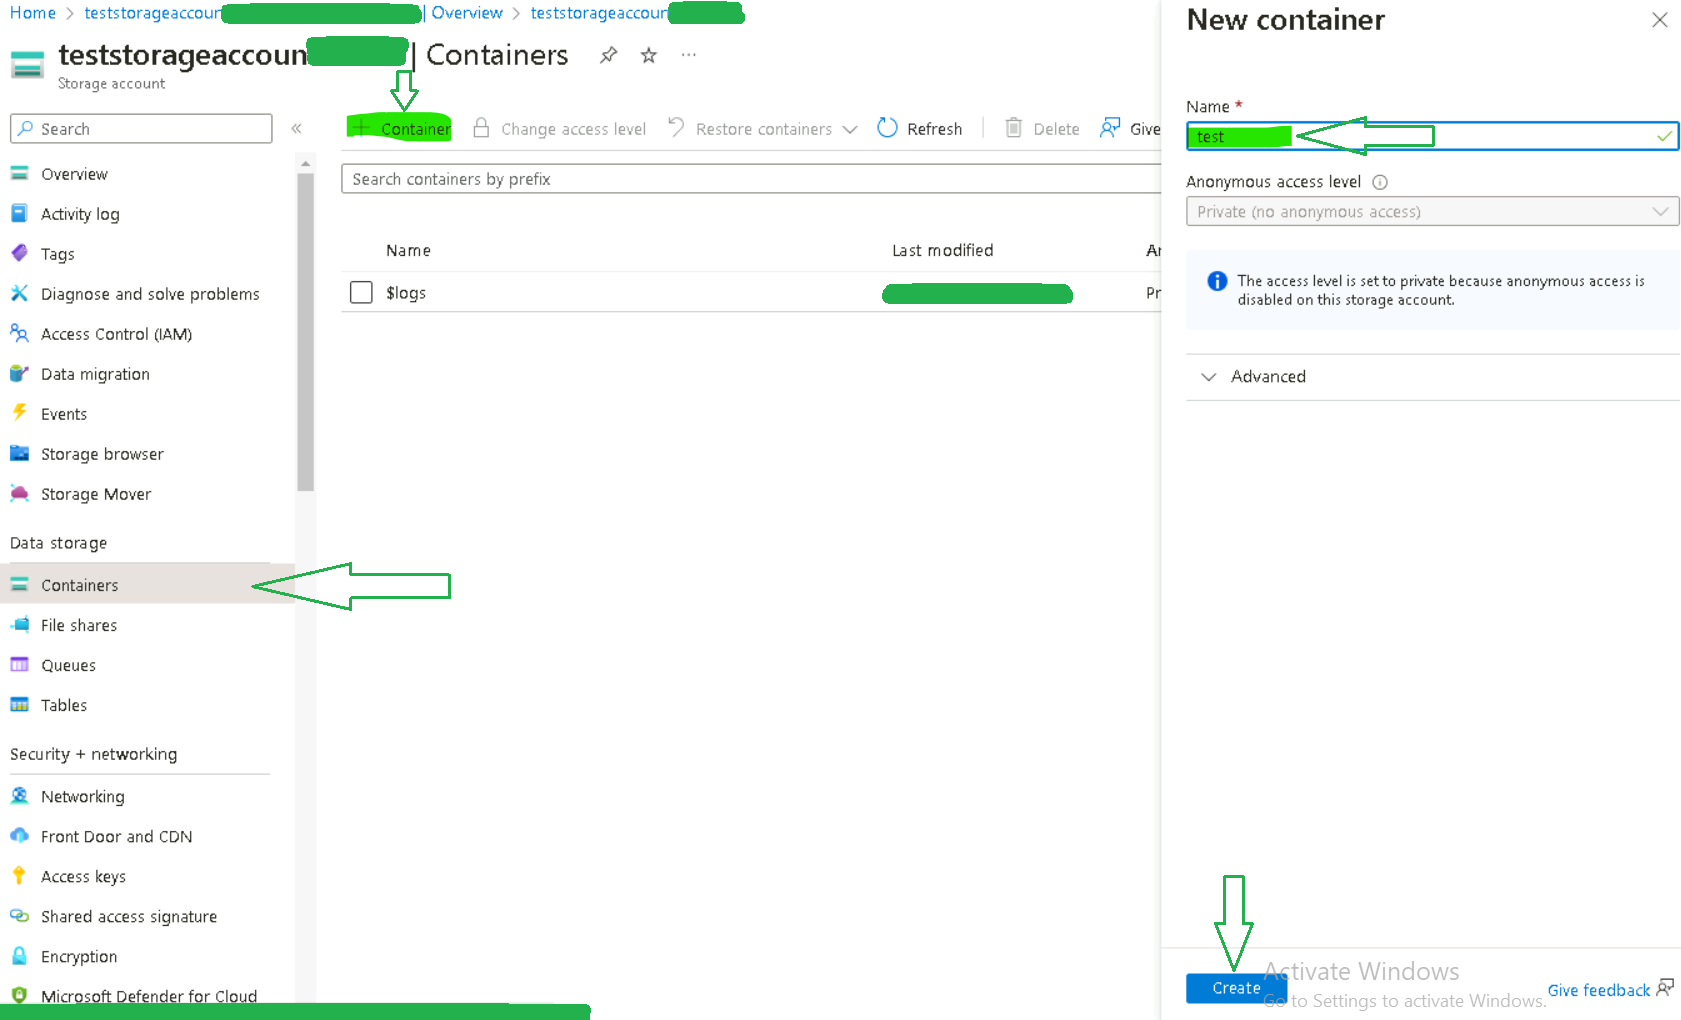
Step 2 – Create Azure storage account container
Select Containers. Click ‘+ Container‘ and type in a name and then click Create. Type the details and select ‘Review + Create‘.
Step 3 – Create new runbook
Navigate to Automation Accounts, select your automation account, click Runbooks and then select Create a runbook.

Enter runbook name, type and version and then select ‘Review + Create‘.

Step 4 – The code
To write files to Azure Blob Storage using PowerShell we first need to connect to Azure with the authenticated runbook automation account.
Connect-AzAccount -IdentityWe then get the available subscriptions for the automation account and select the first one.
$AvailableSubscriptions = Get-AzSubscription
Write-Output "'$($AvailableSubscriptions.count)' Available Subscription(s): $($AvailableSubscriptions)"
Write-Output "Choosing First Subscription: '$($AvailableSubscriptions[0])'"
$SubscriptionId = $AvailableSubscriptions[0]
We set our storage account details.
$SubscriptionId = "########-####-####-####-############"
$ResourceGroupName = "your-resource-group-name"
$StorageAccountName = "your-storage-account-name"
$ContainerName = "your-container-name"
Set-AzContext -SubscriptionId $SubscriptionId
$StorageAccountKey = (Get-AzStorageAccountKey -ResourceGroupName $ResourceGroupName -AccountName $StorageAccountName).Value[0]
$StorageAccountContext = New-AzStorageContext -StorageAccountName $StorageAccountName -StorageAccountKey $StorageAccountKey
Then we create the file locally and write the content “testing” to it.
$FileName = "test.txt"
$LocalFile = "$env:TEMP\" + $FileName
New-Item -Path $LocalFile
"testing" | Set-Content -Path $LocalFile
Finally, we upload the file to Azure’s storage account blob container using the Set-AzStorageBlobContent command.
Set-AzStorageBlobContent -File $LocalFile -Context $StorageAccountContext -Container $ContainerName -Blob $FileName
In the end the runbook should look like this. Save it.
Connect-AzAccount -Identity
$AvailableSubscriptions = Get-AzSubscription
Write-Output "'$($AvailableSubscriptions.count)' Available Subscription(s): $($AvailableSubscriptions)"
Write-Output "Choosing First Subscription: '$($AvailableSubscriptions[0])'"
$SubscriptionId = $AvailableSubscriptions[0]

# set storage account details
$SubscriptionId = "########-####-####-####-############"
$ResourceGroupName = "your-resource-group-name"
$StorageAccountName = "your-storage-account-name"
$ContainerName = "your-container-name"
# set context
Set-AzContext -SubscriptionId $SubscriptionId
# get storage account key
$StorageAccountKey = (Get-AzStorageAccountKey -ResourceGroupName $ResourceGroupName -AccountName $StorageAccountName).Value[0]
# create storage context
$StorageAccountContext = New-AzStorageContext -StorageAccountName $StorageAccountName -StorageAccountKey $StorageAccountKey

# set file name
$FileName = "test.txt"
$LocalFile = "$env:TEMP\" + $FileName
# create local file
New-Item -Path $LocalFile
# write to local file
"testing" | Set-Content -Path $LocalFile

# upload local file to storage blob
Set-AzStorageBlobContent -File $LocalFile -Context $StorageAccountContext -Container $ContainerName -Blob $FileName
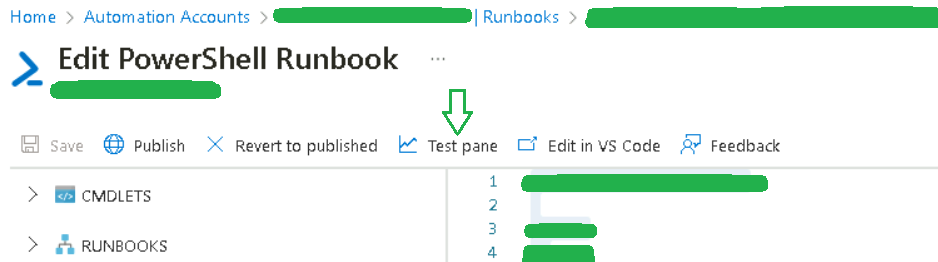
Step 5 – Test runbook using Test pane
In the Edit Runbook window, click Test pane.
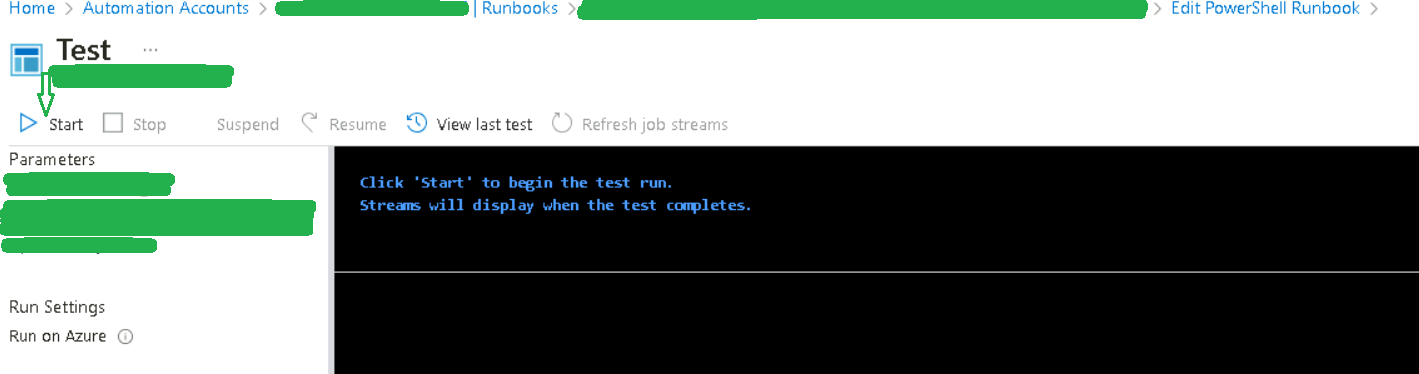
Click Start to test the runbook.
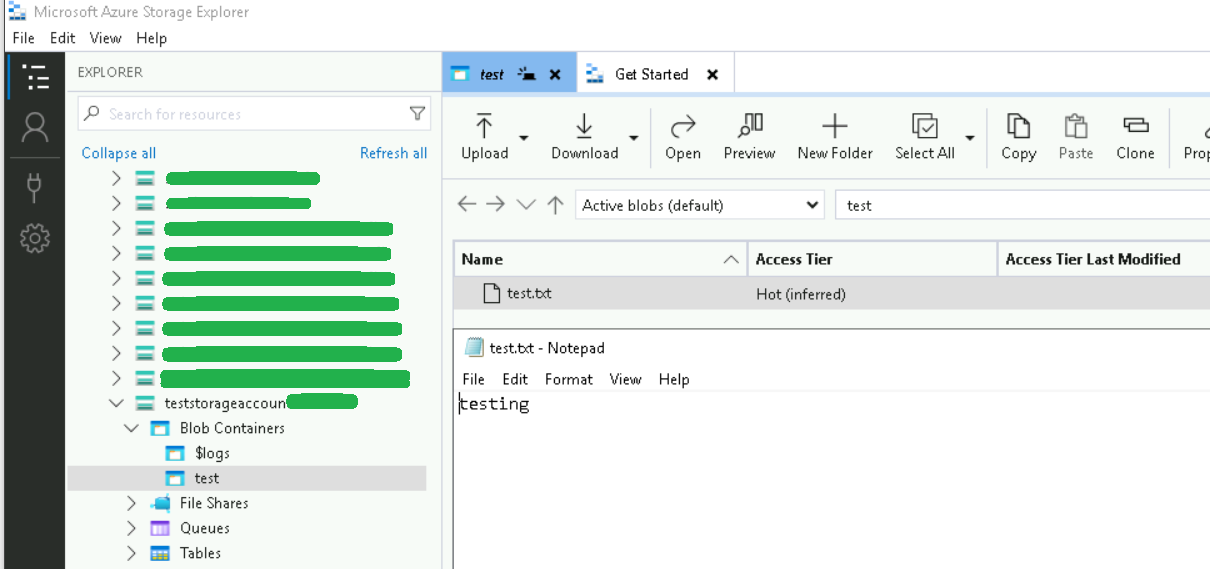
Finally, when the runbook completes you should see a new file named test.txt in the Azure Blob Container.
Found this helpful? Comment below! ↓
One thought on “Write Files to Azure Blob Storage using PowerShell”
Thanks for writing this article, it worked perfectly. I owe you a beer or two 🙂