For some reason the vast majority of VMware environments we run into continue to utilize the default untrusted self-signed VMware web client front end certificate. Why? Who knows – maybe because admins are intimidated by the seemingly daunting procedure of replacing the default machine SSL certificate. But let’s face it, daunting or not, any HTTPS website should present a valid trusted certificate to its clients or user experience is degraded. In this post we demonstrate how to easily replace vSphere web client certificate for VMware vCenter Server Appliance 6.7 with a Microsoft Certification Authority.
Easily Replace vSphere Web Client Certificate – Introduction
Scenario – users are getting a certificate error such as the following when accessing a VMware vSphere web client:
- “This Connection is Untrusted”
- “Your connection is not private”
- “This site is not secure”
- “There is a problem with this website’s security certificate”
- “Your connection to this site is not secure”
- “ERR_CERT_AUTHORITY_INVALID”
- “DLG_FLAGS_INVALID_CA”
For example:
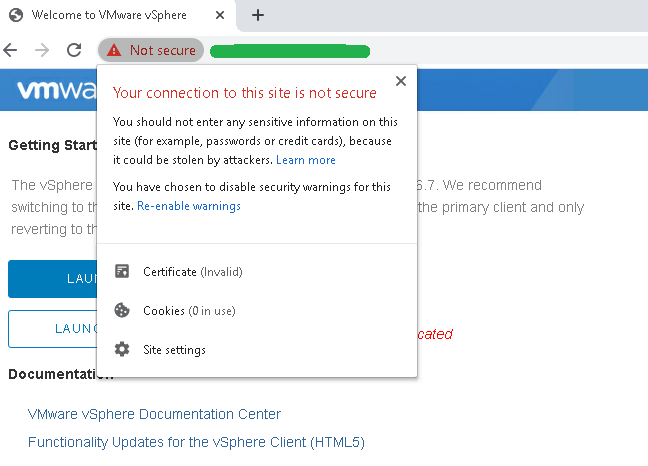
In short, vSphere web client presents an error or warning that pertains to an invalid certificate with untrusted certification authority. This warrants one of two solutions:
- Install a trusted certificate on the VMware vCenter Server Appliance, OR
- Import the default self-signed VMware certificate into the client device’s certificate store.
In this post we demonstrate solution 1 which is to install a trusted certificate on the VMware vCenter Server Appliance. We will use our internal Microsoft CA to easily replace vSphere web client certificate. Let’s also keep in mind that a certificate from any third-party certification authority like GoDaddy, EnTrust, Comodo, Let’s Encrypt, or Digicert would work as well. Option 2 will not be discussed here because while it may also resolve the issue, it is not appropriate for those enterprise organizations where self-signed certificates are not allowed.
Easily Replace vSphere Web Client Certificate – Procedure
Summary of Steps
A. Prerequisites
B. Generate CSR
C. Create vSphere Certificate Template
D. Generate Certificates
E. Import Certificates to vSphere
A. Prerequisites
1. Download and install PuTTY to connect into the VMware vCenter Server Appliance using SSH.
2. Download and install WinSCP to facilitate transfer of CSR, private key and certificate files to and from VMware vCenter Server Appliance.
3. Obtain the Root and [email protected] credentials of the VMware vCenter Server Appliance.
4. Have a readily available Microsoft CA trusted by the consumers of our vSphere web client.
B. Generate CSR
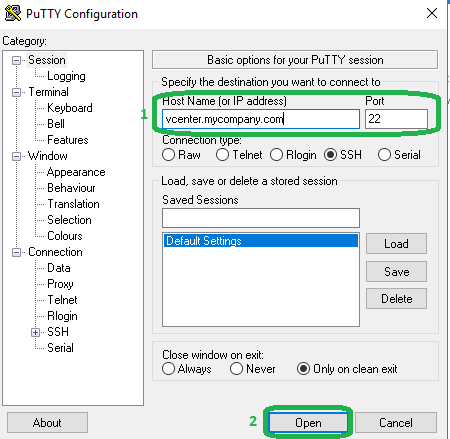
1. Launch PuTTY.
2. Enter the Host Name or IP address of the vSphere device and click Open. (use port 22)
Note: replace vcenter.mycompany.com with the hostname of the vcenter host in your environment.
3. Login as root.
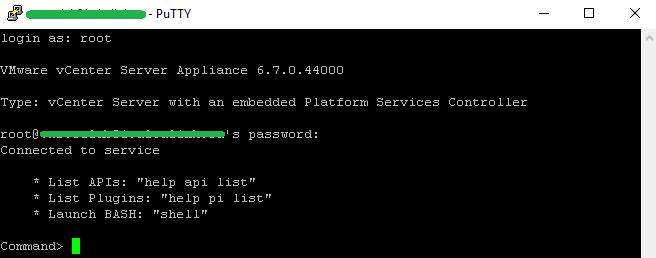
4. Enable and launch Bash Shell. Then launch certificate-manager and select Replace machine SSL certificate with Custom Certificate.
shell.set --enabled True
shell
/usr/lib/vmware-vmca/bin/certificate-manager
1
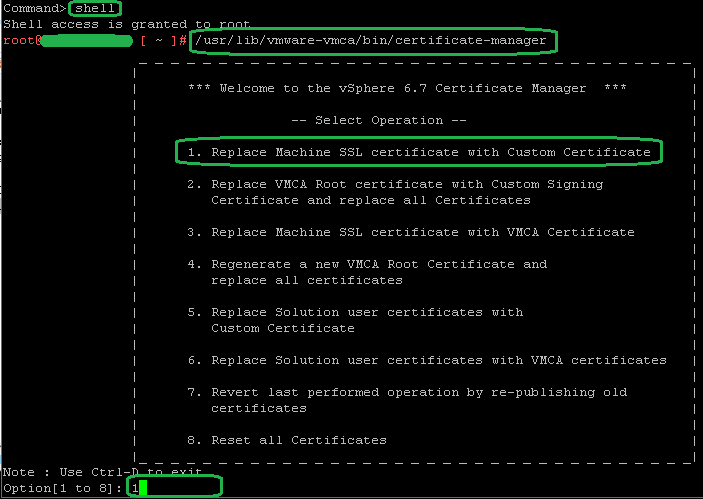
5. Type 1 and press ENTER to select Generate Certificate Signing Request(s) and Key(s) for Machine SSL certificate. Login using [email protected] credentials. Enter the desired output directory path (if left blank the files should end up in the /root directory when using root account).
You will need to fill out the following CSR fields:
Country: (e.g. US)
VMCA Name (e.g. VMCAname.yourdomain.com)
Organization (e.g. Your Business)
OrgUnit (e.g. IT)
State (e.g. Florida)
Locality (e.g. Miami)
IPAddress (e.g. 192.168.1.150)
Email (e.g. [email protected])
Hostname (e.g. VMCAname.yourdomain.com)
Fully Qualified Domain Name (e.g. VMCAname.yourdomain.com).
See Wikipedia’s Certificate_signing_request and VMware’s Generating Certificate Requests for more information on CSR fields.
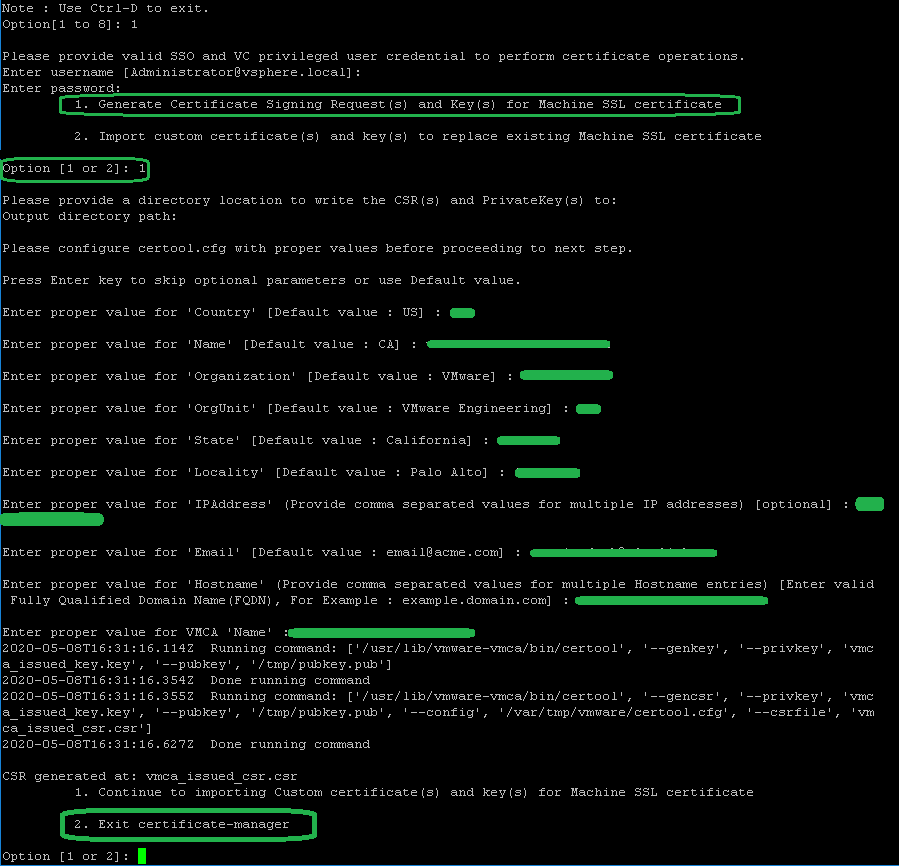
6. Type 2 and press ENTER to Exit certificate-manager.
C. Create vSphere Certificate Template
Note: if you already have a valid template you can skip on to section D.
1. RDP into your Microsoft CA server and launch Certificate Templates Console. (i.e. Start | Run | certtmpl.msc)
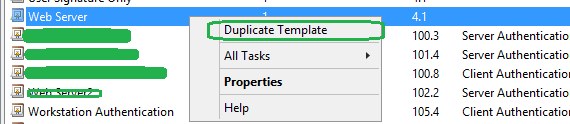
2. Right-click the Web Server template and select Duplicate Template to create a new template.
3. Under the General tab, enter the name of the new vSphere template. (i.e. vSphere 6.x)

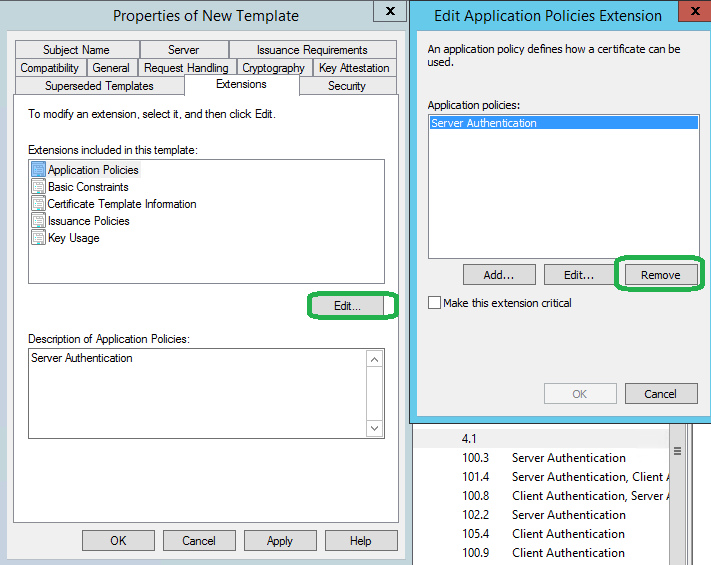
4. Under the Extensions tab, select Application Policies, click Edit, select Server Authentication, click Remove, and then click OK, to remove the Server Authentication extension. Also remove Client Authentication if present.
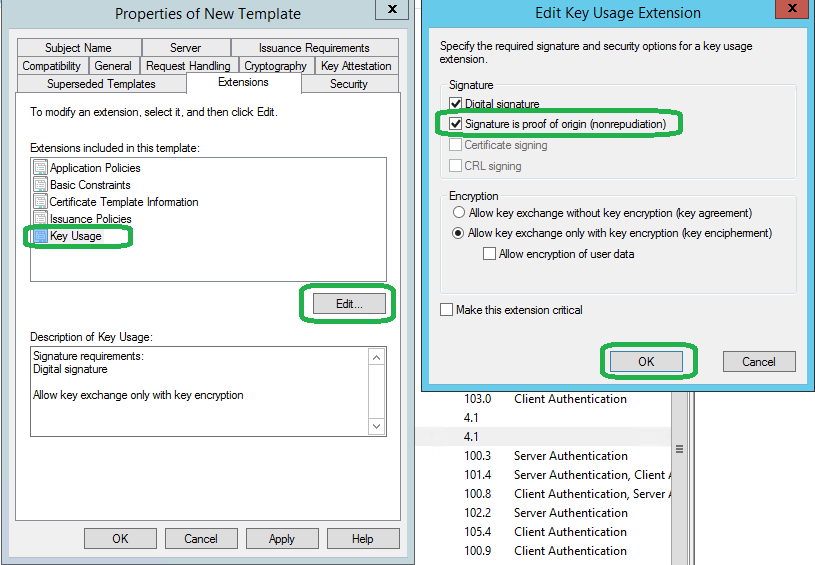
5. Select Key Usage, click Edit, select Signature is proof of origin (nonrepudiation) and then click OK.
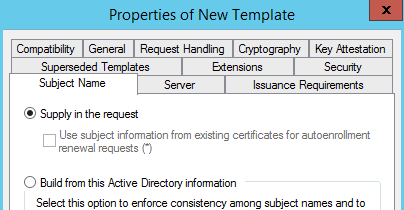
6. Under the Subject Name tab, ensure Supply in the request is selected and click OK to create the template.
7. Launch Certification Authority console (i.e. Start | Run | certsrv.msc).
8. Right-click Certificate Templates, select New and then click Certificate Template to Issue.
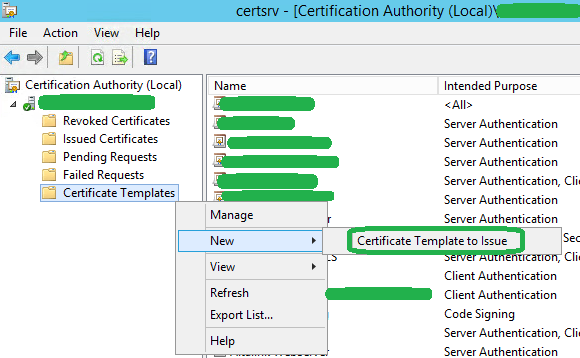
9. Select the newly created vSphere template and then click OK to publish the template.
D. Generate Certificate
This section summarizes the certificate generation process using a Microsoft CA. Steps will vary when using a different Certification Authority like EnTrust, GoDaddy, etc.
Copy CSR Contents
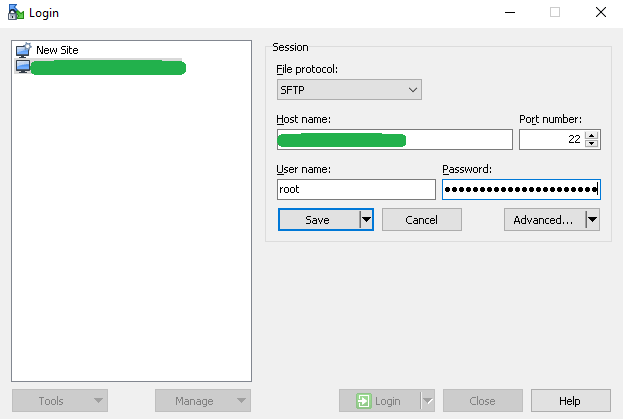
1. Launch WinSCP and connect to the VMware vCenter server appliance using sftp.
Note: if you are unable to connect to the appliance using WinSCP, you may need to run chsh -s /bin/bash root on the appliance before being able to connect.
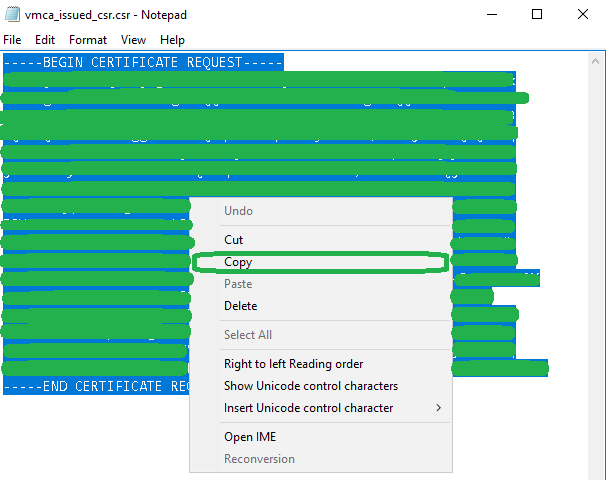
2. Navigate to the folder where the key and csr files were created. Right-click the CSR file and click Open to open it in notepad. Note: select the Notepad app as default app to open CSR file.
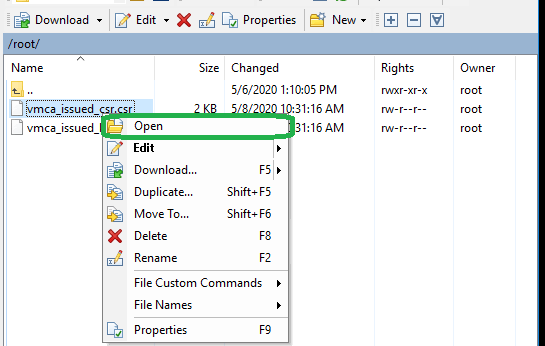
3. In Notepad, right-click, choose Select All and then click Copy. Alternatively, press Ctrl+A to Select All and Ctrl+C to copy the contents to clipboard. You can now close the CSR file.
Create Certificate
4. Navigate to your internal Microsoft CA web enrollment URL and select Request a certificate.
The URL should be something like https://IssuingCAServerFQDN/certsrv. Alternatively, you can also skip steps 4 and 5 by navigating directly to https://IssuingCAServerFQDN/certsrv/certrqxt.asp.

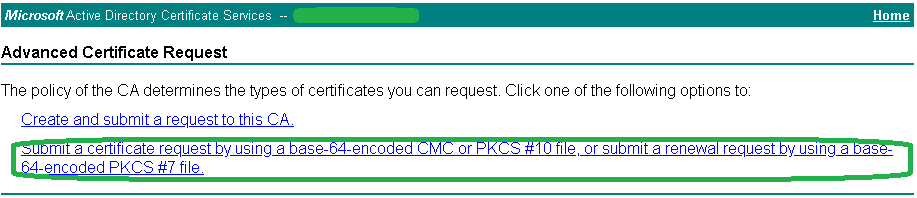
5.Select Submit a certificate request by using a base-64-encoded CMC or PKCS #10 file, or submit a renewal request by using a base-64-encoded PKCS #7 file.
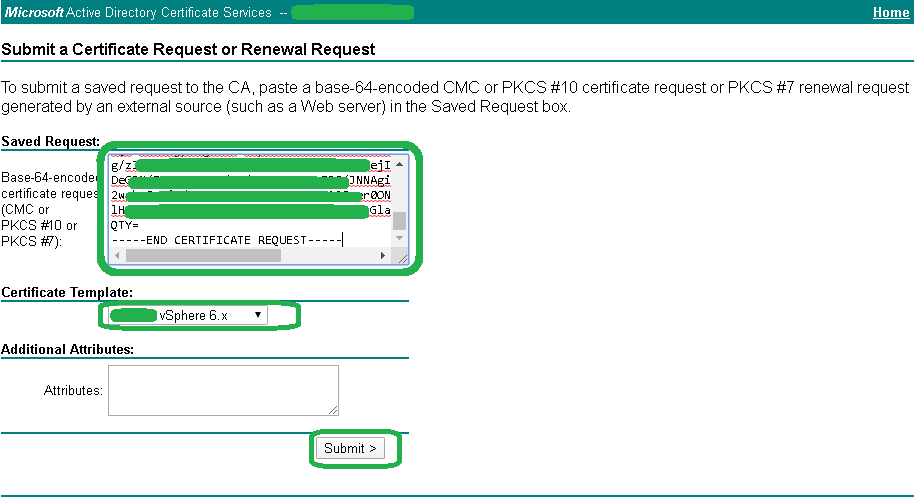
6. Paste the CSR contents into the certificate request text area field, select our vSphere template created earlier and click Submit.
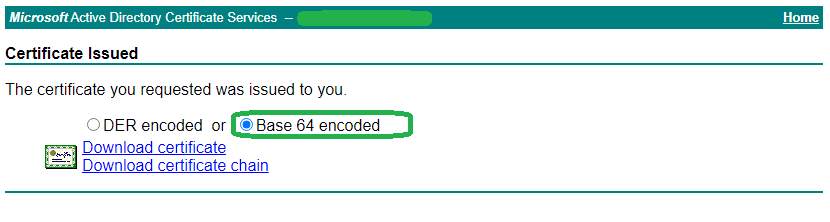
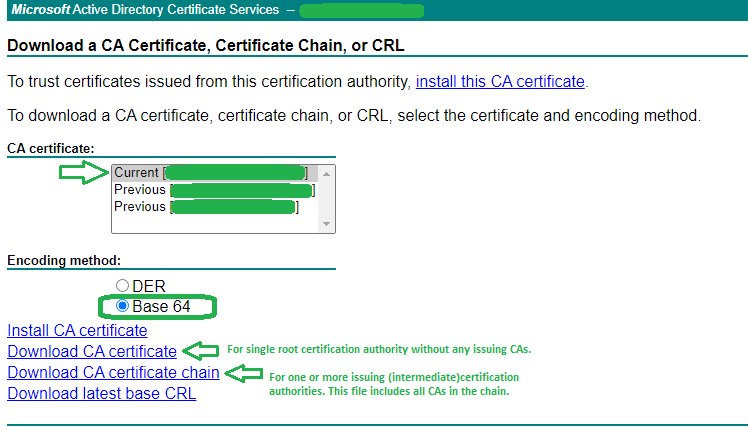
7. Download the BASE64 certificate and certificate chain.
8. Download the Root CA certificate(s) at https://IssuingCAServerFQDN/certsrv/certcarc.asp
Note: If you have one or more intermediate certificate authorities, the root64.cer file should contain a chain of all intermediate CA and Root CA certificates. The machine_name_ssl.cer file should contain the full chain for machine certificate + intermediate/issuing CA(s) + root(CA) with the machine certificate at the top of the file, top-level root at the bottom and intermediate or issuing CA(s) in the middle. We need to bundle the certificate chain into both files having the .cer (not .p7b) extension.
E. Import Certificates to vSphere
Finally, the moment we have been waiting for. Loading our new trusted certificates into the VMware vCenter Server Appliance.
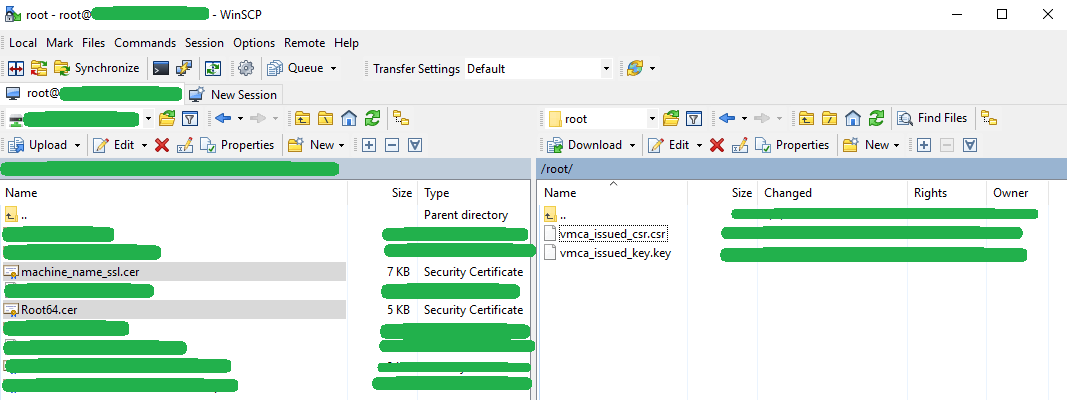
1. Launch WinSCP and connect to the VMware vCenter server appliance using sftp.
2. Transfer newly created certificate files to the VMware vCenter Server Appliance.
Note: two files in total will be transfered. (1) Machine SSL certificate and (2) Root CA certificate(s).
3. Launch PuTTY.
4. Enter the Host Name or IP address of the vSphere device and click Open. (use port 22)
3. Login as root.
4. Launch certificate-manager and select Replace machine SSL certificate with Custom Certificate.
shell
/usr/lib/vmware-vmca/bin/certificate-manager
1
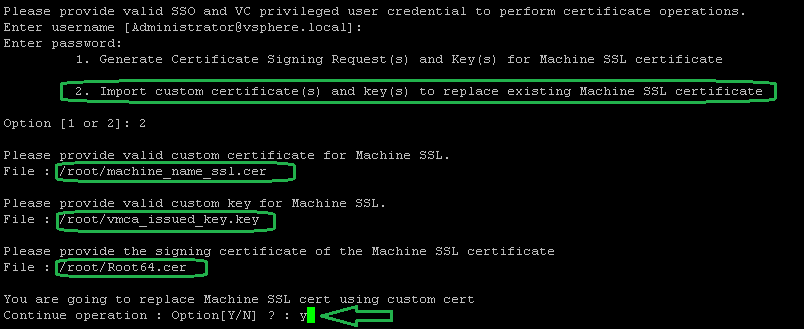
5. Select option 2 to Import custom certificate(s) and key(s) to replace existing Machine SSL certificate. Then enter the paths to the machine certificate file, key file and root CA file. Type Y and hit ENTER to proceed with the certificate replacement. Enjoy some popcorn and hope for the best…
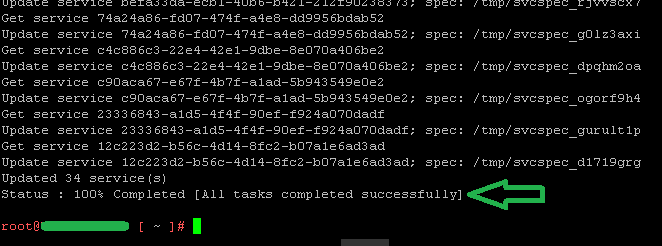
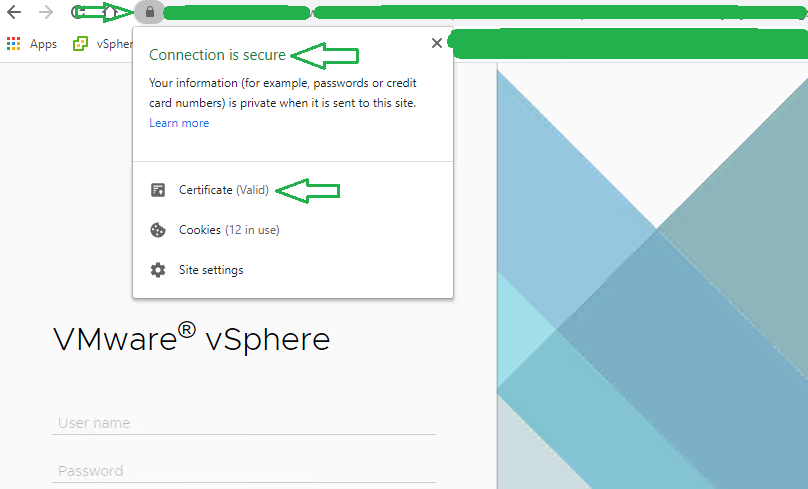
6. We have done a fine job…
4 thoughts on “Easily Replace vSphere Web Client Certificate”
First excellent blog. Thank you. It really helped.
small suggestion.
Try show the details – enter proper name for VMCA. I ended up putting same name as vCenter.
Hope it helps other. It is VMCA name you have to give
Good catch and thanks for the feedback. Updated!
Thanks! Giving this a shot now. Much appreciated.
One thing to note for those with a root and an intermediate CA that wasn’t immediately clear to me was creating the CA certificate chain in a format that VMCA could use. I ended up downloading the p7b file and opening it up. From there I was able to export my intermediate CA and my root CA certificates. Next I opened them both up in a text editor. Copy the contents of the root CA certificate to the end of the intermediate CA certificate (see below). Save the file as sometime like cert-chain.cer.
—–BEGIN CERTIFICATE—–
intermediate CA cert
—–END CERTIFICATE—–
—–BEGIN CERTIFICATE—–
root CA cert
—–END CERTIFICATE—–