Surprisingly, generating a properly-formed Certificate Signing Request (CSR) is not as common knowledge amongst admins as would appear at first. In this post we review how to properly generate CSR on Windows Server. Or, for that matter, on any modern Windows machine. Let’s go…
Generate CSR on Windows Server
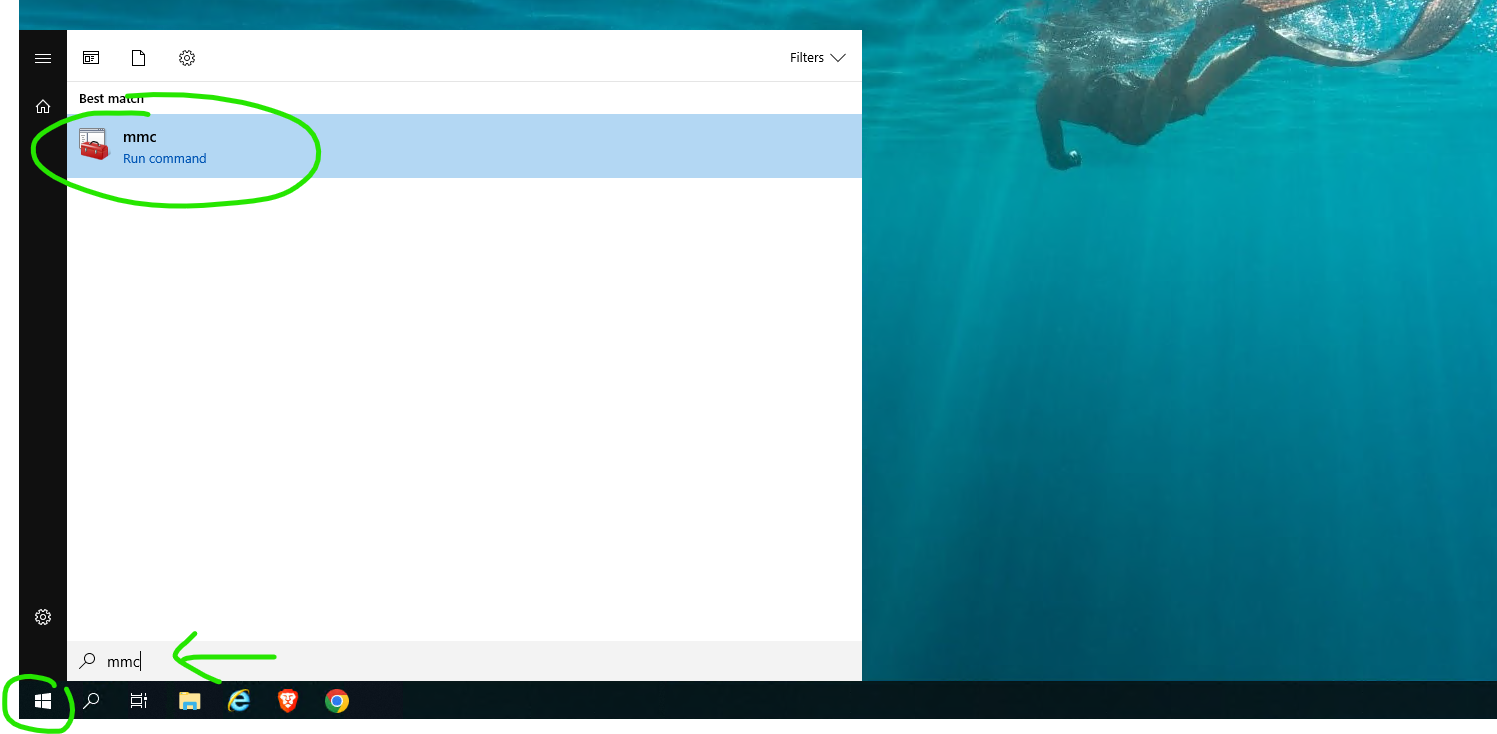
Step 1
Launch MMC Console by clicking Start and then typing “mmc” and hitting Enter. Alternatively, type mmc in PowerShell or Command Prompt window and hit Enter.
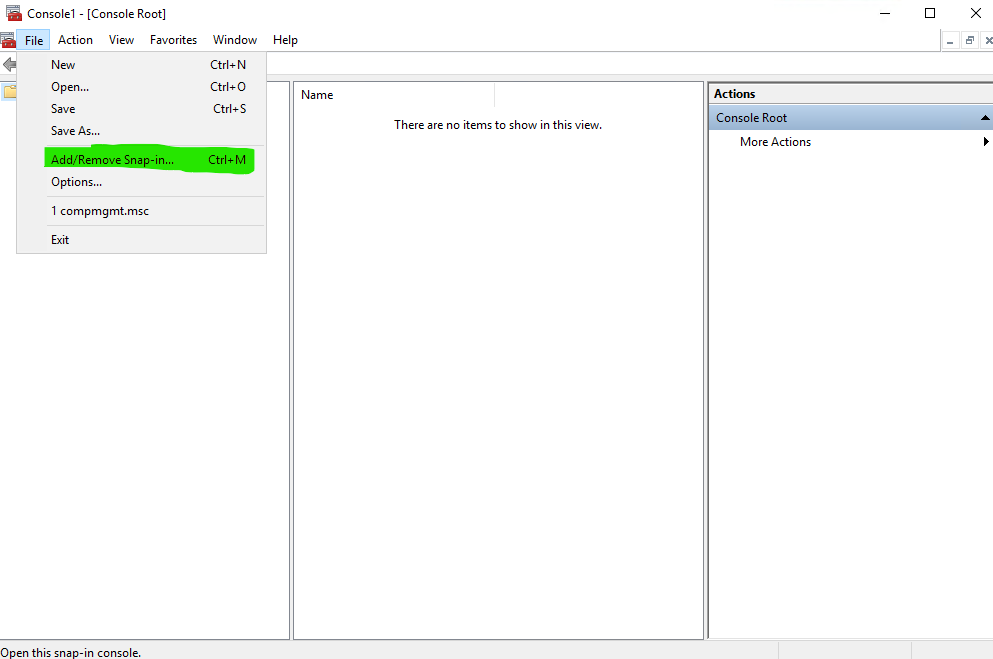
Step 2
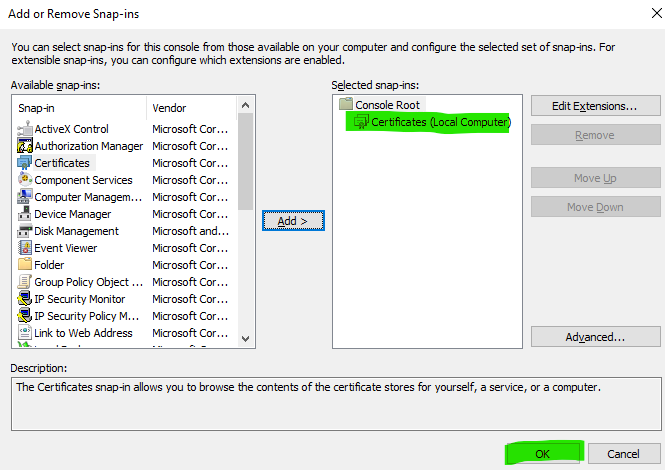
Click File and then select Add/Remove Snap-in… or press Ctrl+M.
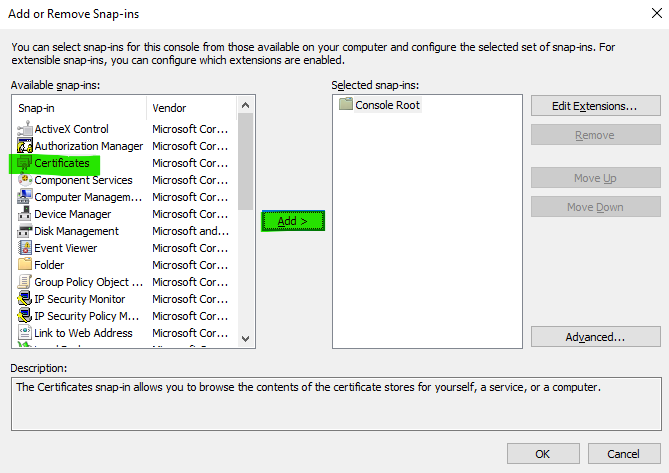
Step 3
From the Available snap-ins list, select Certificates and then click Add.
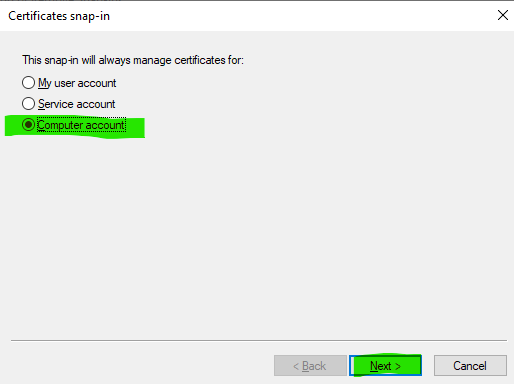
Select Computer account and click Next.
Leave the default option (Local computer) and click Finish.

Click OK to add the snap-in.
Step 4
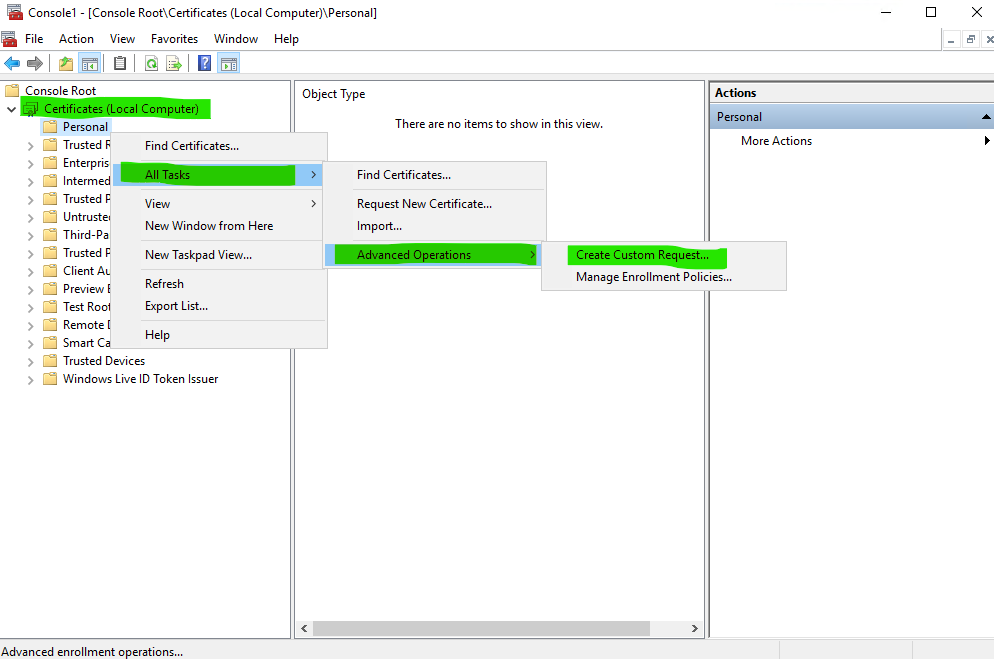
Expand the Certificates (Local Computer) node, right-click Personal, select All Tasks, Advanced Operations and then click Create Custom Request…
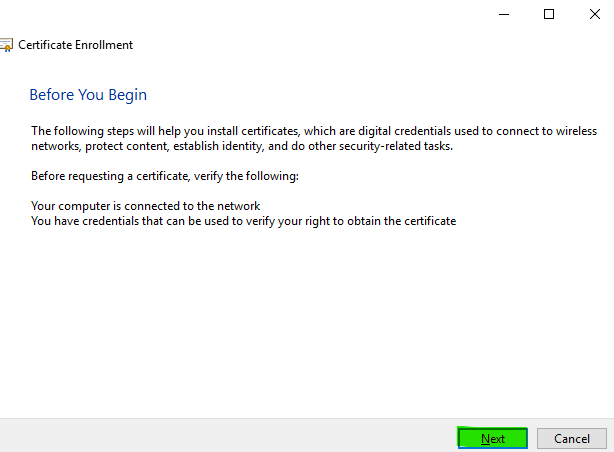
Step 5
Click Next.
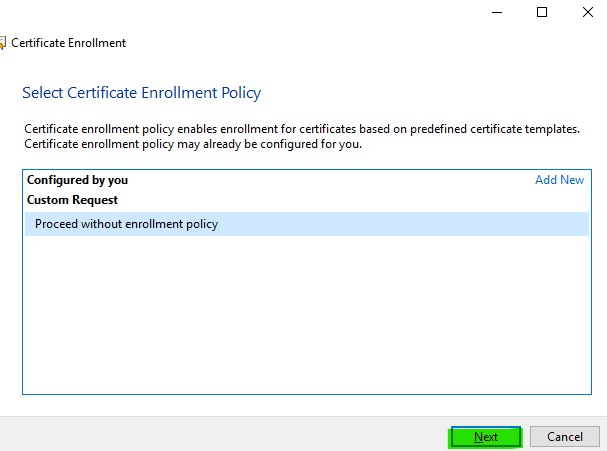
Step 6
Select Proceed without enrollment policy and click Next.
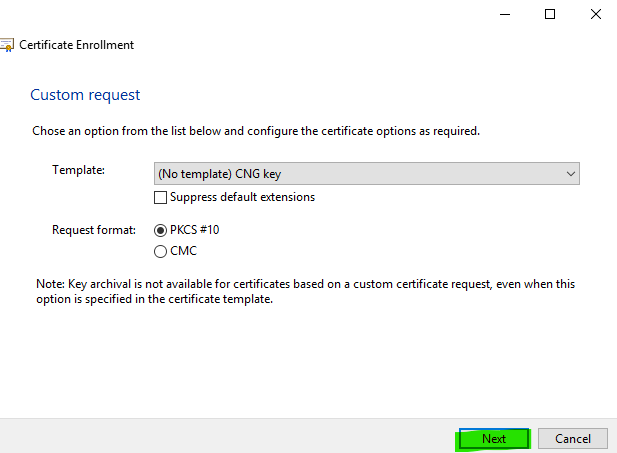
Step 7
Click Next.
Note: Only change the Template option and Request format if you have specific requirements. If you are unsure, just leave the default options.
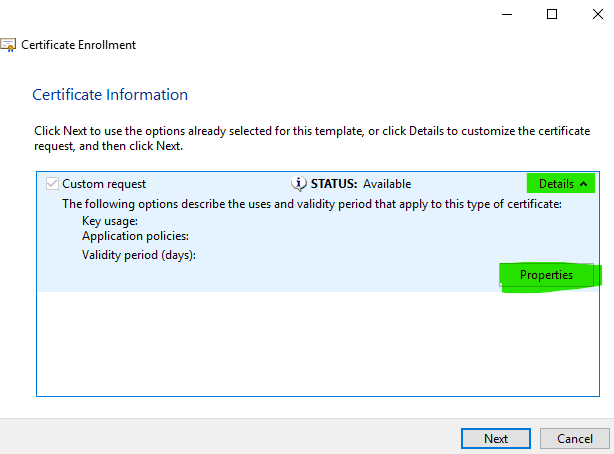
Step 8
Click the down arrow next to Details to expand the Custom request options and then select Properties.
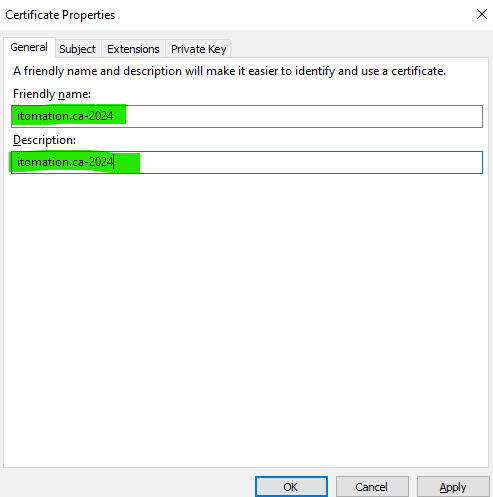
Step 9
Under the General tab, enter a friendly name and description for the certificate.
Note: Make it descriptive by entering the Fully Qualified Domain Name (FQDN) of the certificate followed by a hyphen and the current year in both fields. For example, itomation.ca-2024.
Step 10
Under the Subject tab add the certificate’s details.

Note: As a general rule of thumb, for external (internet-facing) certificates add the Common Name (CN), Organization (O), Organization Unit (OU), Locality (L, or City), State (S, or Province), Country (C). For internal certificates not consumable outside of your organization it may be acceptable to add only the common name.
Always ensure that at least one Alternative Name (SAN) entry of type DNS is added to match the common name of the certificate’s subject as found in our example, especially for certificates signed internally on a Microsoft CA, for example. Multiple SANs can be added during CSR creation.
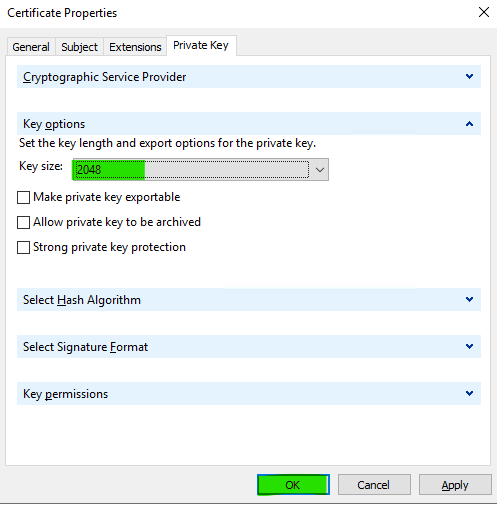
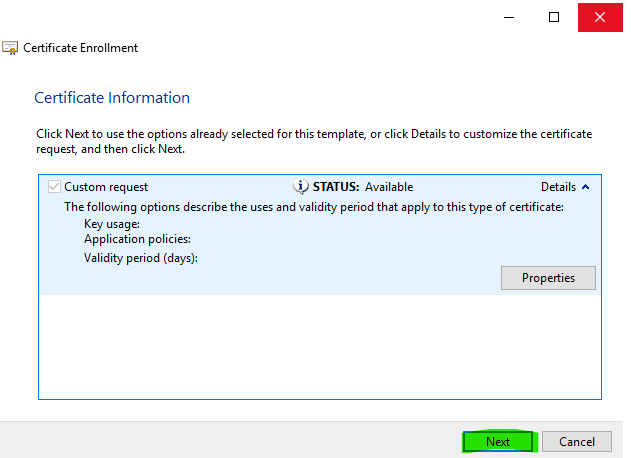
Step 11
Under the Private Key tab expand Key options and increase the key size to a minimum of 2048 bits. Click OK.
Note: If you think you will require a pfx export of the certificate public/private key combination, ensure that the Make private key exportable option is selected. However, as a security best practice, the Make private key exportable option should remain unchecked in all other cases.
Step 12
Click Next.
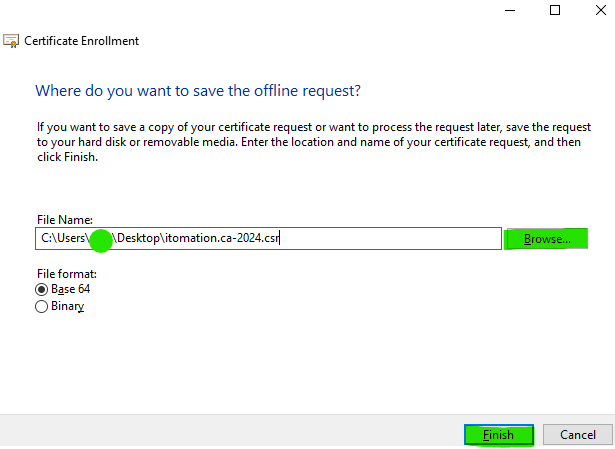
Step 13
Click Browse… to select a name and location for the new CSR file. Click Save and then click Finish.
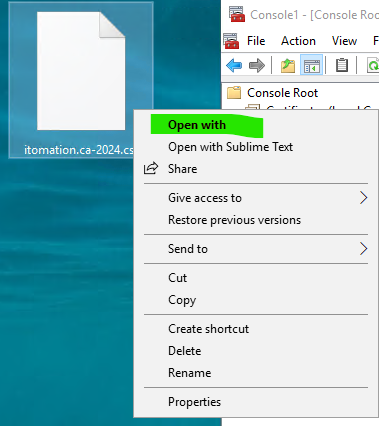
Step 14
To view the CSR contents, right-click the file and select Open with, then select Notepad as the application.
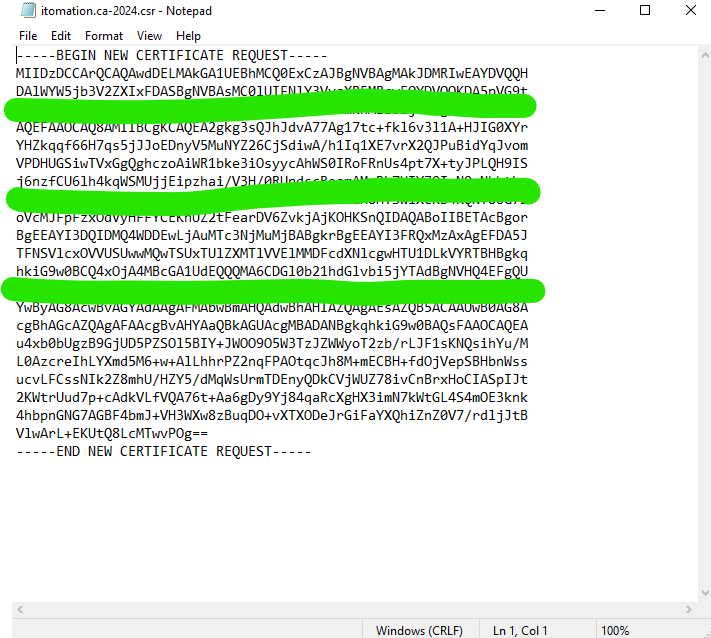
The CSR should look something like this…
We are done! Found this helpful? Have feedback? Comment below… ↓