Today we explore a procedure many admins seem to despise – that is, to migrate Microsoft CA to new server. Yes, this is a proven fact. Many admins, for various reasons, seem to prefer to delegate this task to the PKI experts. But, of course, with proper planning and due diligence, there is nothing to despise here.
In this walkthrough, we migrate a Windows Server 2012 R2 (Core) to a Windows Server 2022 (Desktop Experience). Yes, the source server is a core server without the Windows GUI, which means there is no way to back up its CA via the usual means in the certsrv console. This procedure should work for a none-core source server migrations as well.
We’ll call our old CA server ca01 and new CA server ca02. Let’s dive in…
Migrate Microsoft CA to New Server
Back up old CA server
1. Back up old CA server role using Backup-CARoleService.
Backup-CARoleService C:\Windows\Temp\CABackup -Password (ConvertTo-SecureString "@bcd1234!" -AsPlainText -Force)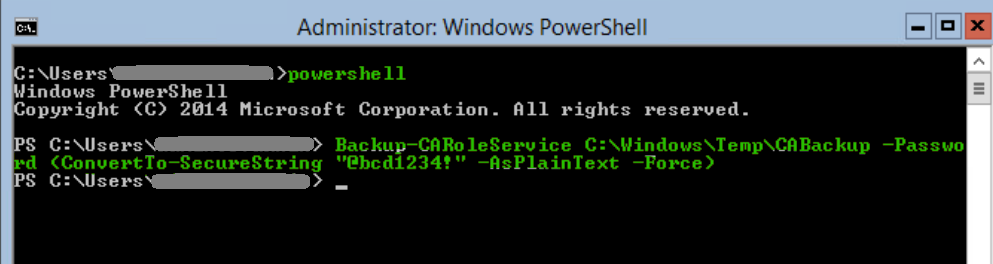
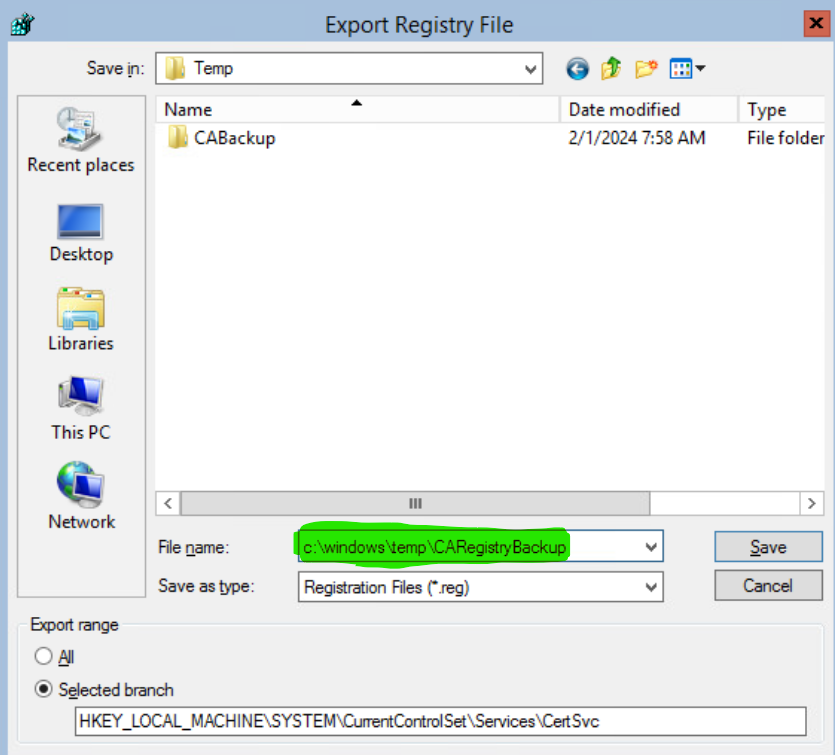
2. Back up old CA server registry via the GUI. The Registry Editor user interface is available in server core. 😃
Type regedit and hit Enter. Right-click HKEY_LOCAL_MACHINE\SYSTEM\CurrentControlSet\services\CertSvc and select Export to save the registry.

Name the file CARegistryBackup.reg and save it in C:\Windows\Temp.
3. On the old CA server, check if a file named CAPolicy.inf exists in C:\Windows. We will need to copy it over to the new server.
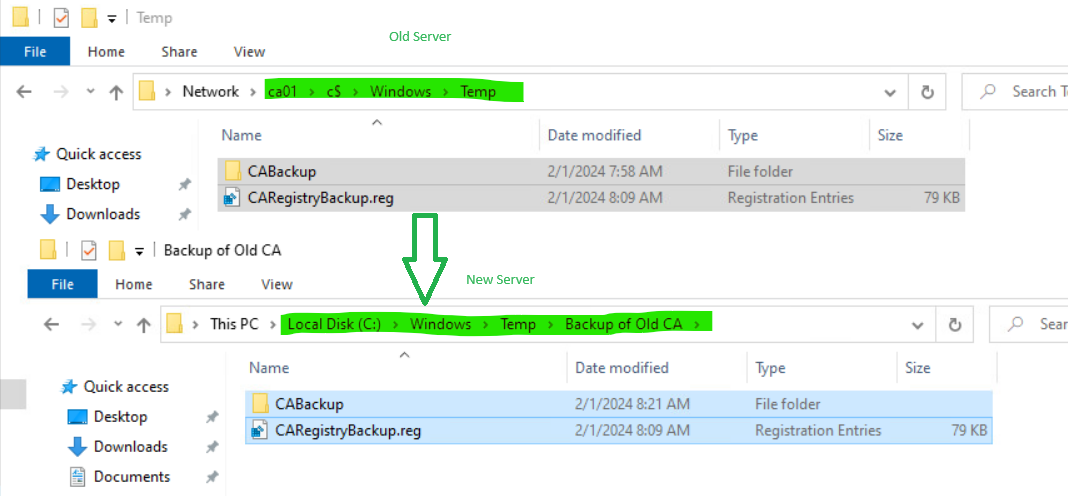
4. On the new CA server, navigate to \\oldCA\c$\Windows\Temp and copy all backup files and folders created in steps (1), (2) and (3) from the old server to the new server. They will be needed for restoring the CA role on the new server.
4. On the old CA, close the registry editor if still open, remove CA role and reboot.
Remove-WindowsFeature -Name AD-Certificate or
shutdown /r /t 00Restart-Computer
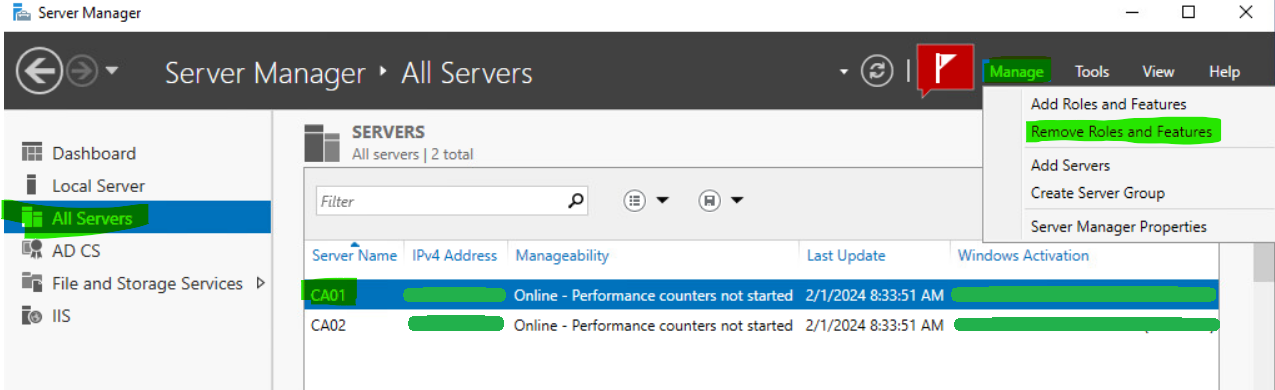
Alternatively, to the Remove-WindowsFeature command, we can remove the CA role from the old server remotely via GUI using ServerManager on our new CA server or any other server for that matter.
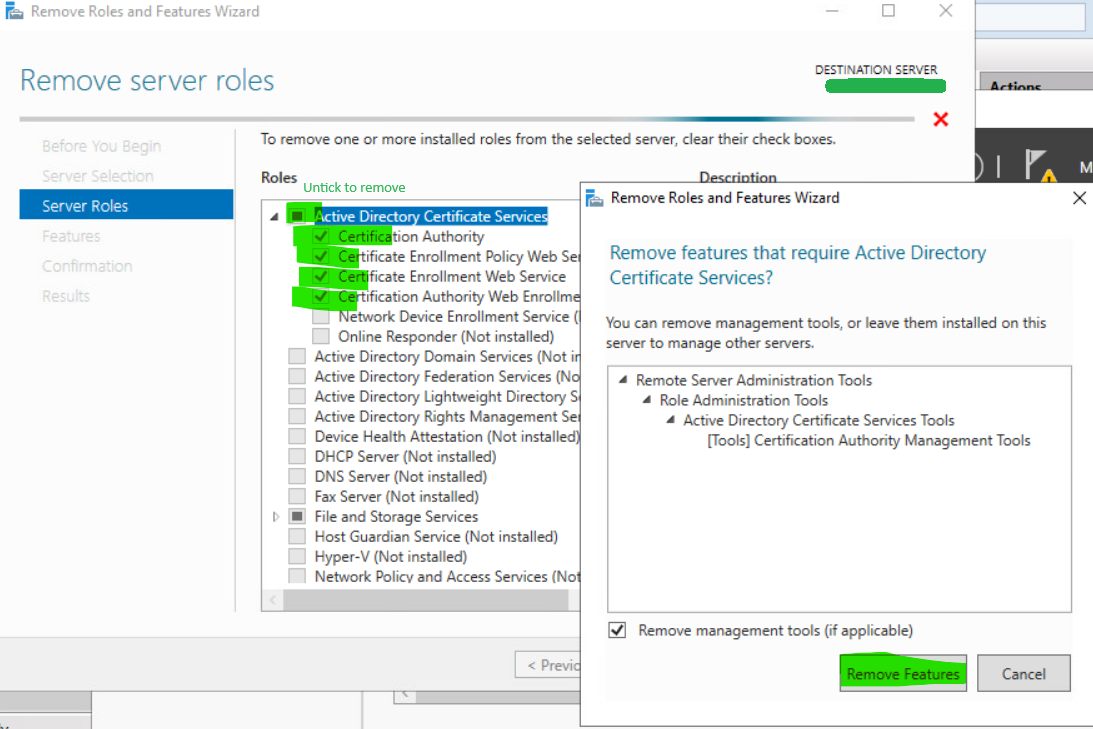
In Server Manager, click All Servers | Manage | Add Servers to add our old CA to the list. Then, ensuring the old CA server is selected, click Manage | Remove Roles and Features. Note, you may have to uninstall the Web Enrollment service before removing the CA role completely.
To remove a role, untick it on the Remove server roles screen and the click Remove Features.
Note: As an alternative to this method, we can eliminate CA role removal by just shutting down the old CA server but we need to make sure it never ever comes back online once the new CA server has been configured. This may be a good scenario for a quick backout procedure, but we normally elect to properly remove the old CA role as we don’t like running the risk of the old server lingering in the environment – this can cause issues.
Rename Servers
5. Rename old CA server from ca01 to ca01-old, reboot and wait for it to come back up.
Rename-Computer -NewName "ca01-old" -Restart

6. Rename new CA server from ca02 to ca01 and reboot.
Rename-Computer -NewName "ca01" -Restart
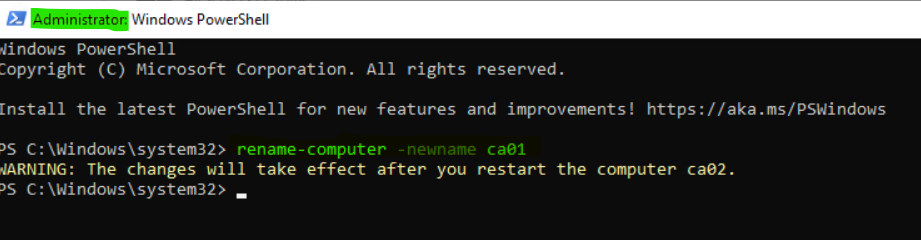
Once the server is back up, verify its new name before proceeding to the next step. To verify its name type “hostname” in the commandline.
Install CA Role on New Server
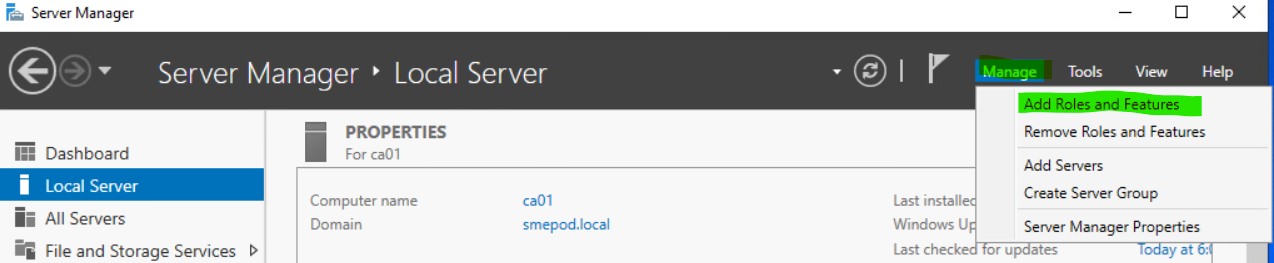
7. Via Server Manager, add CA role on new CA server. To add the new role open Server Manager, select Manage and then click Add Role and Features. Click Next three times to get to the Select server roles screen.
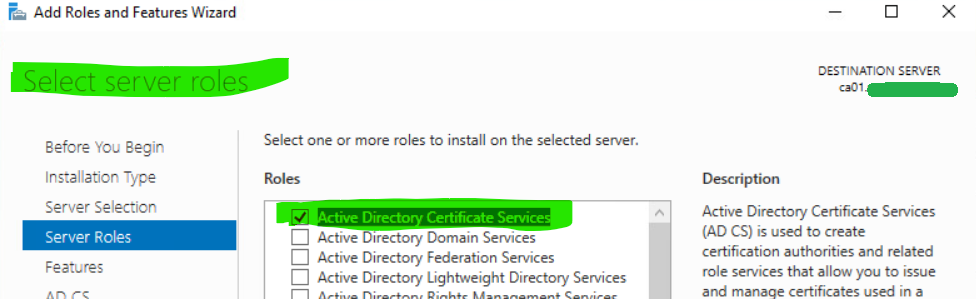
8. In the Select server roles screen, check Active Directory Certificate Services and click Next three times.
9. Select required role services and their features and then click Next.

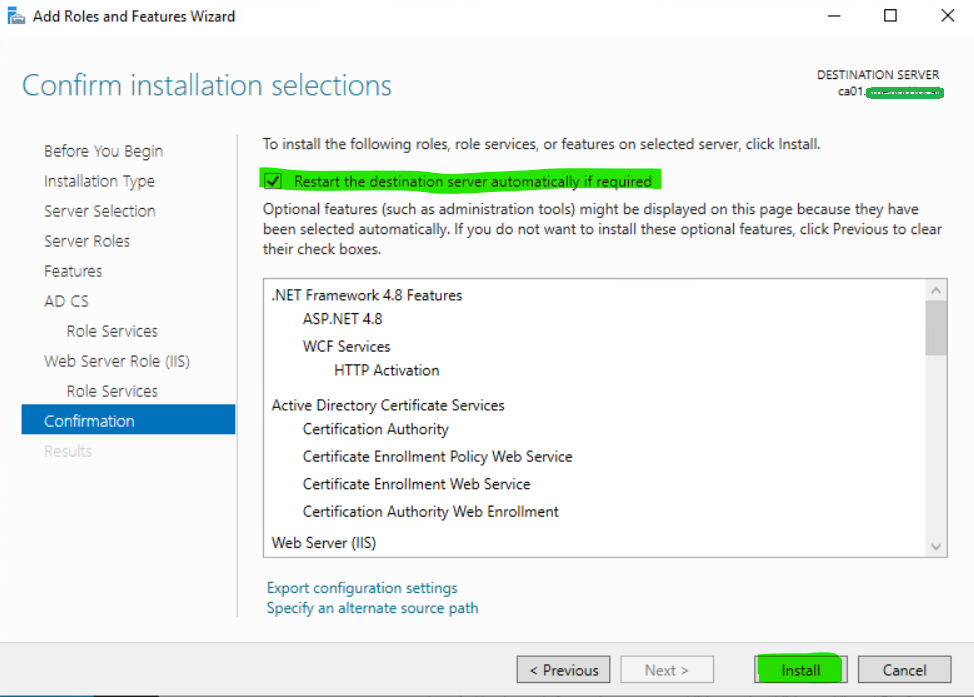
10. Click Next three times and then Install to begin the CA installation.
Configure CA Role on New Server
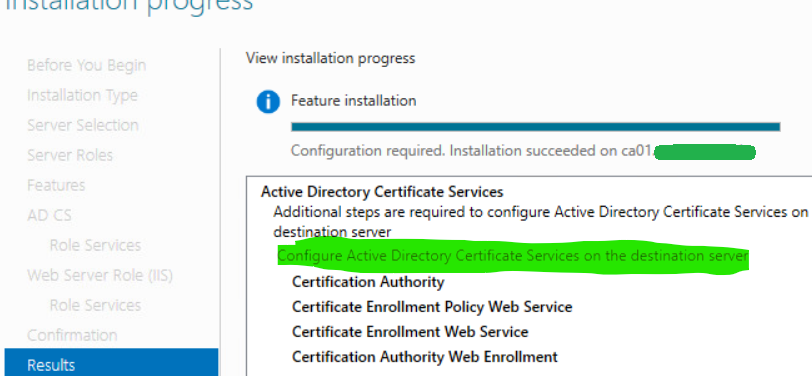
11. When the installation completes, select Configure Active Directory Certificate Services to configure the new CA role.
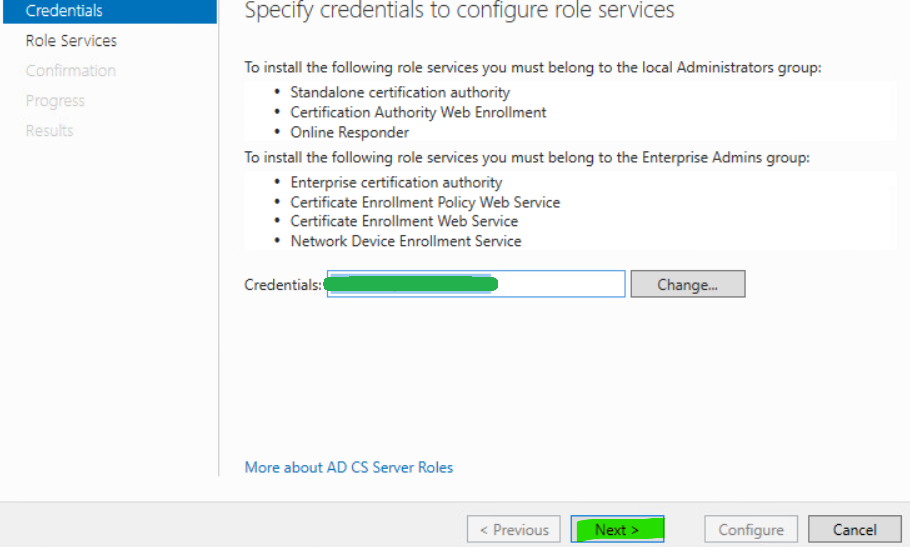
12. Specify appropriate domain credentials and click Next.
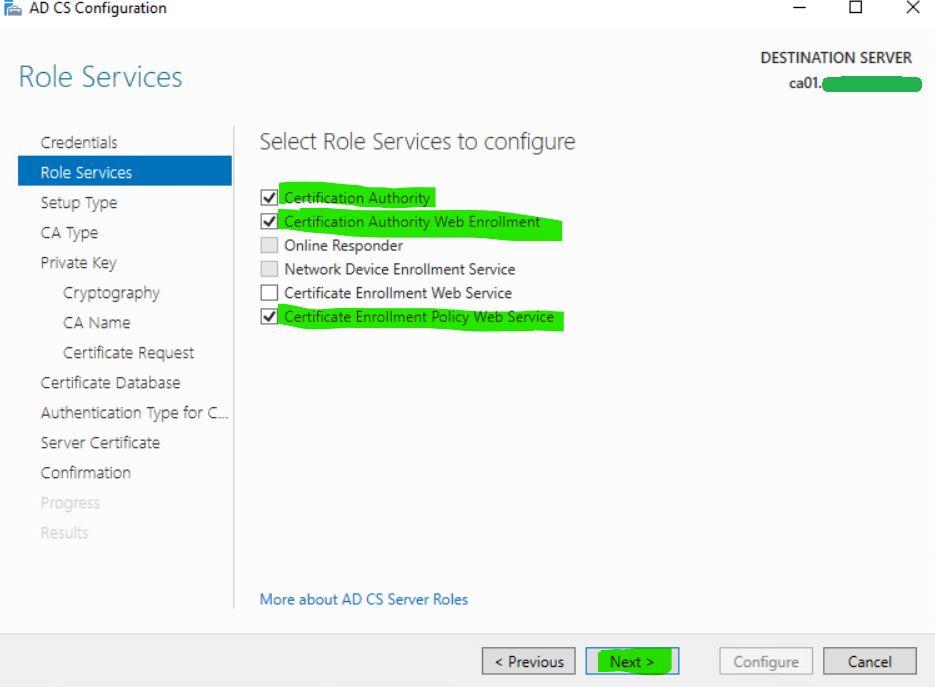
13. Specify required role services and click Next.
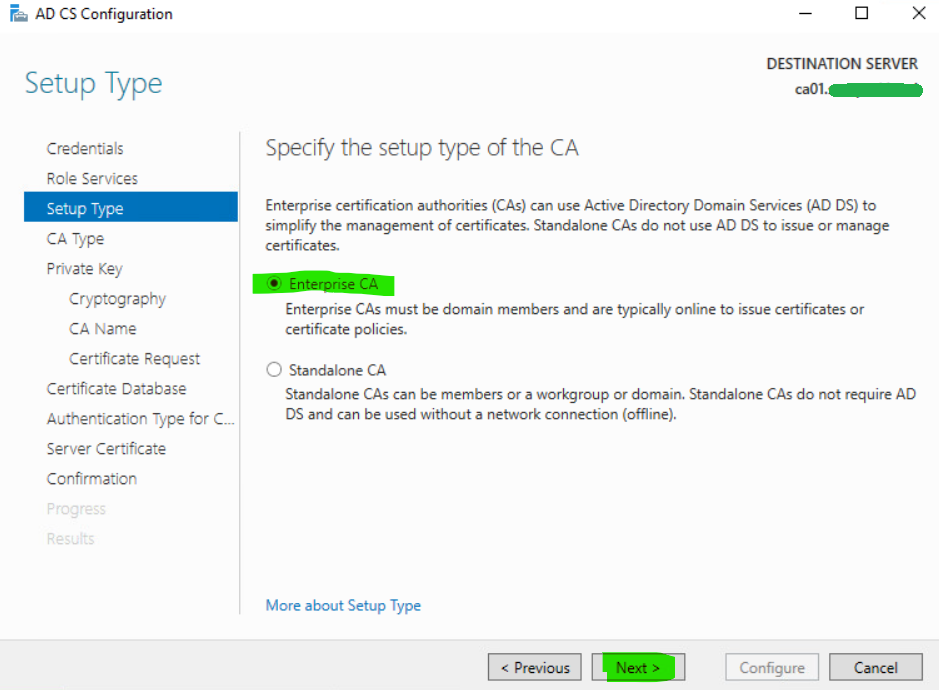
14. Specify the CA type and click Next. In our case, it is Enterprise CA.
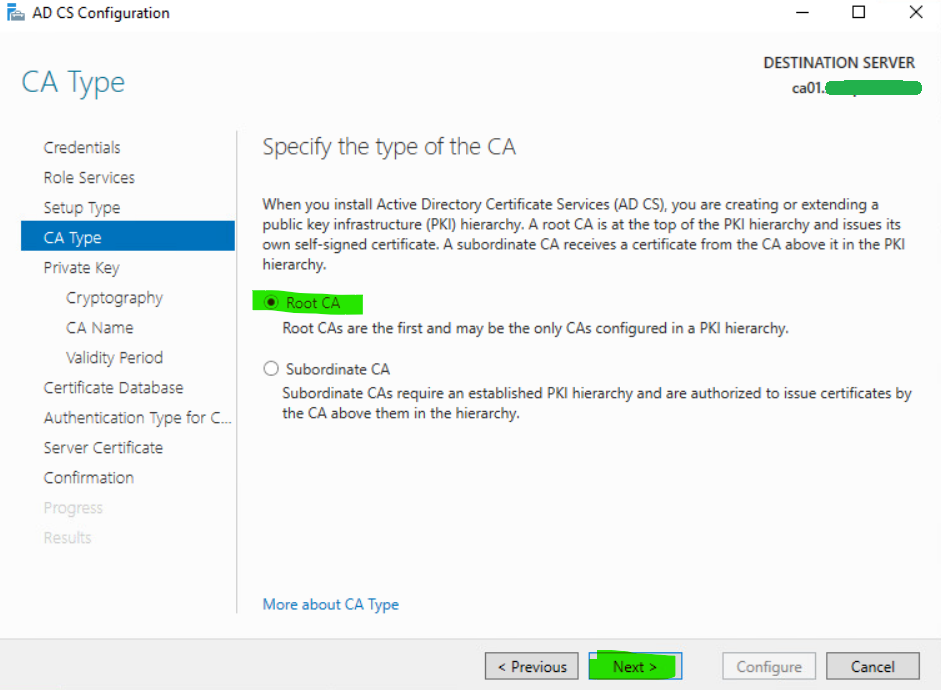
15. Select Root CA and then click Next.
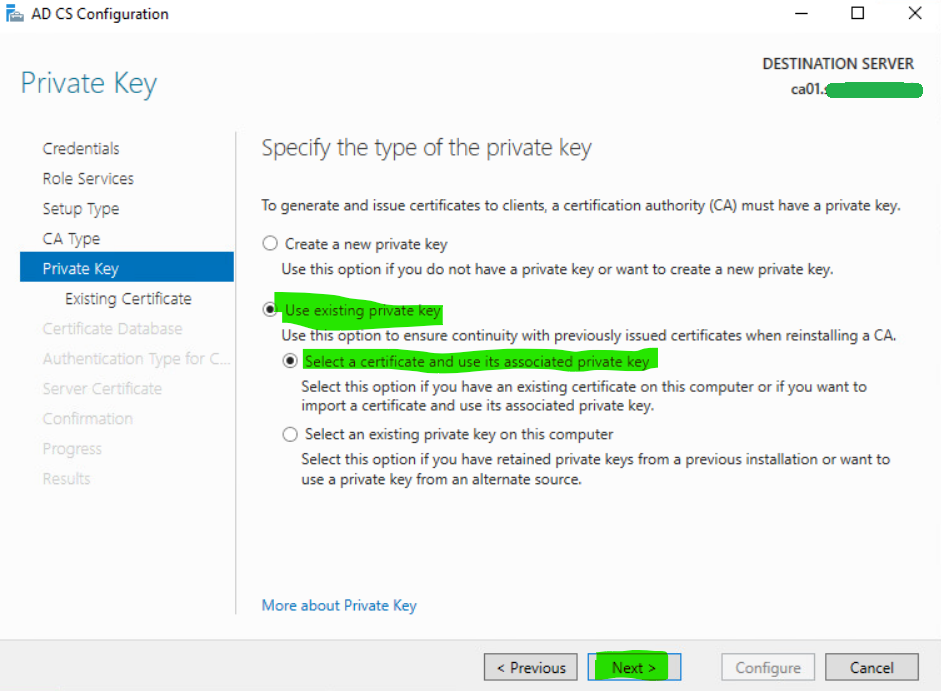
16. Select Use existing private key with Select a certificate and use its associated private key option. Click Next.
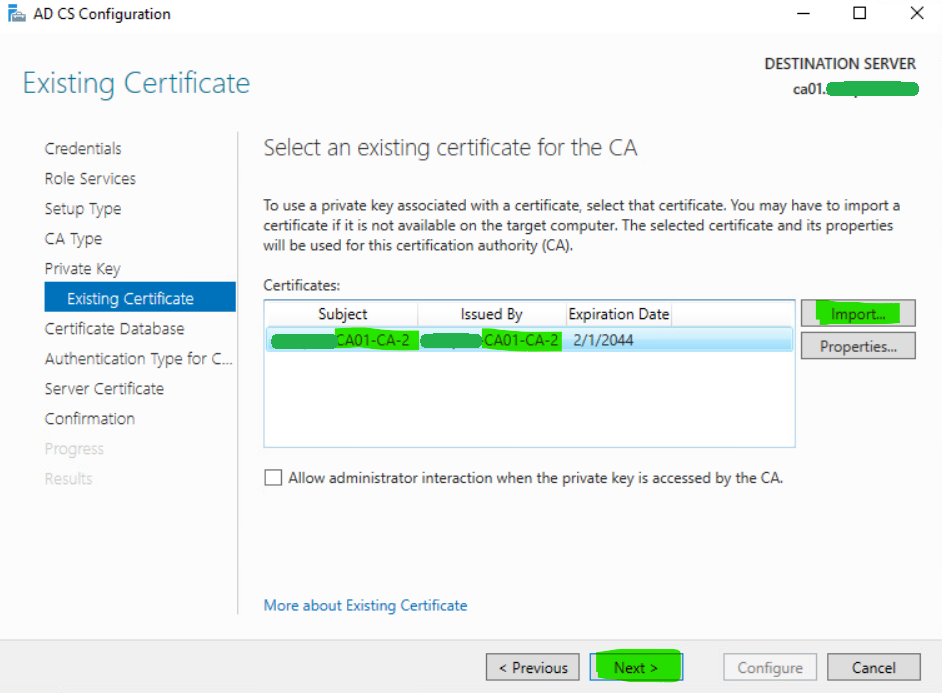
17. Select Import and then import the private key. It should be located under C:\Windows\Temp. Click Next.
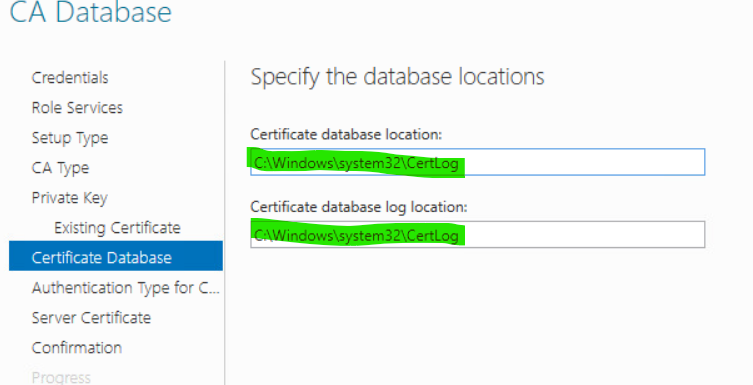
18. Specify the default database locations and click Next.
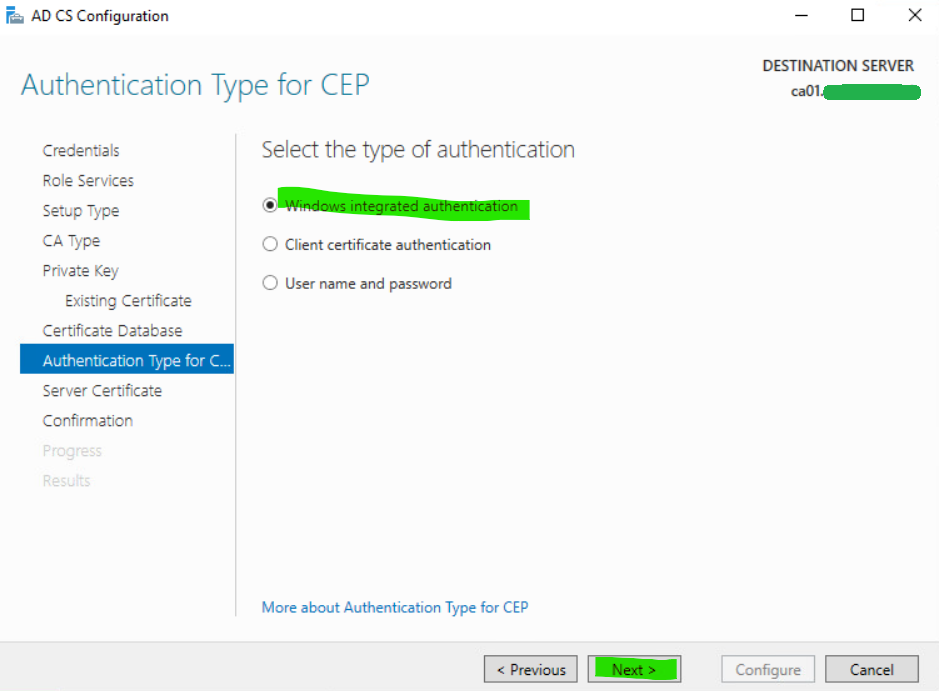
19. Select the appropriate Authentication type for CEP and click Next.
20. Select an appropriate certificate to use for SSL encryption.
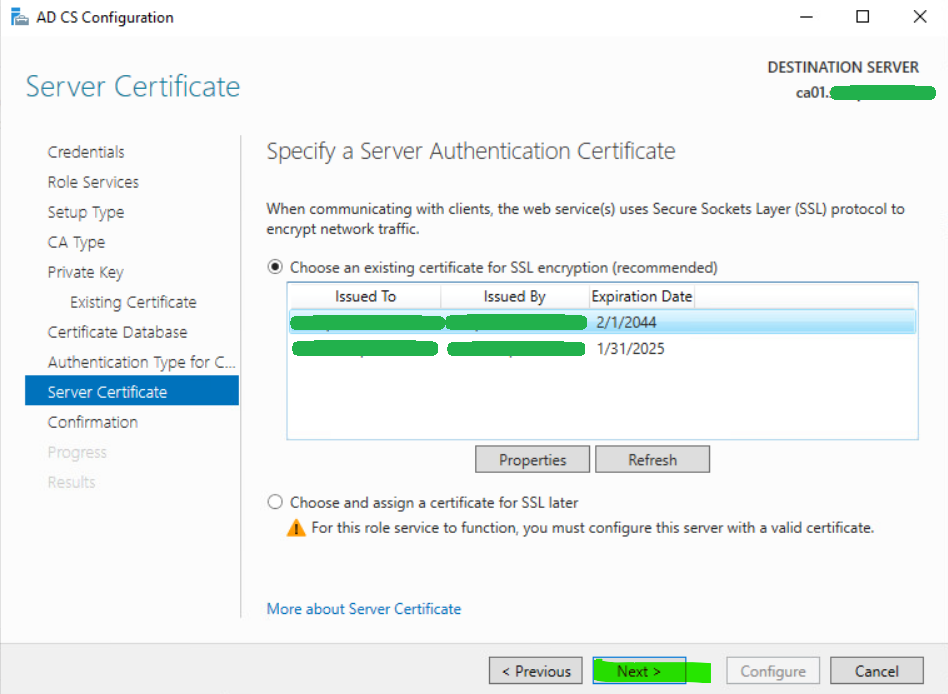
If there are no certificates available, create a self-signed one via IIS | Server Certificates | Create Self-Signed Certificate…. Then select Refresh and it should show up.
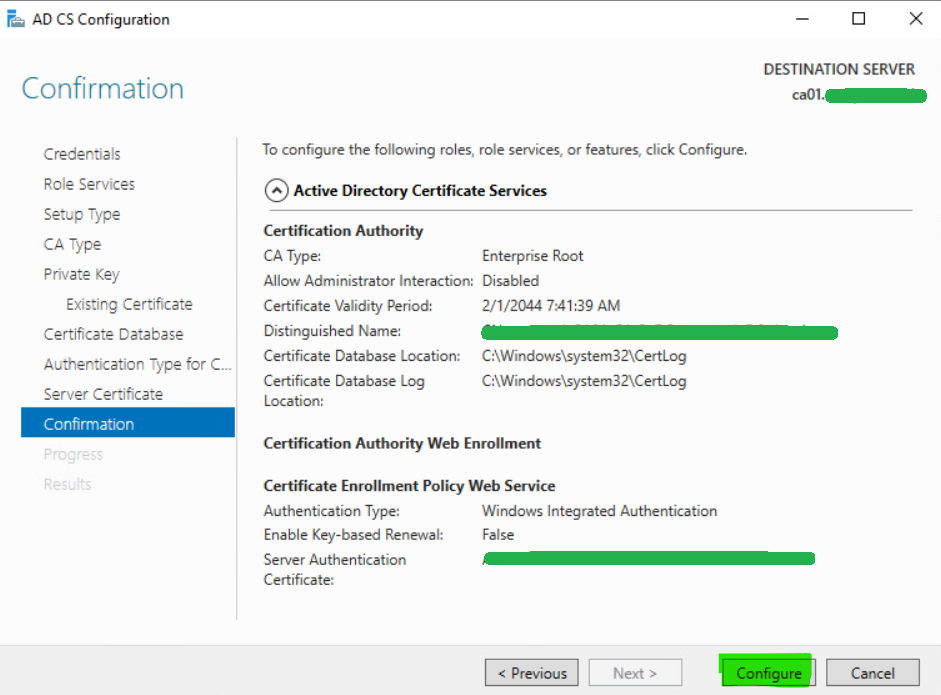
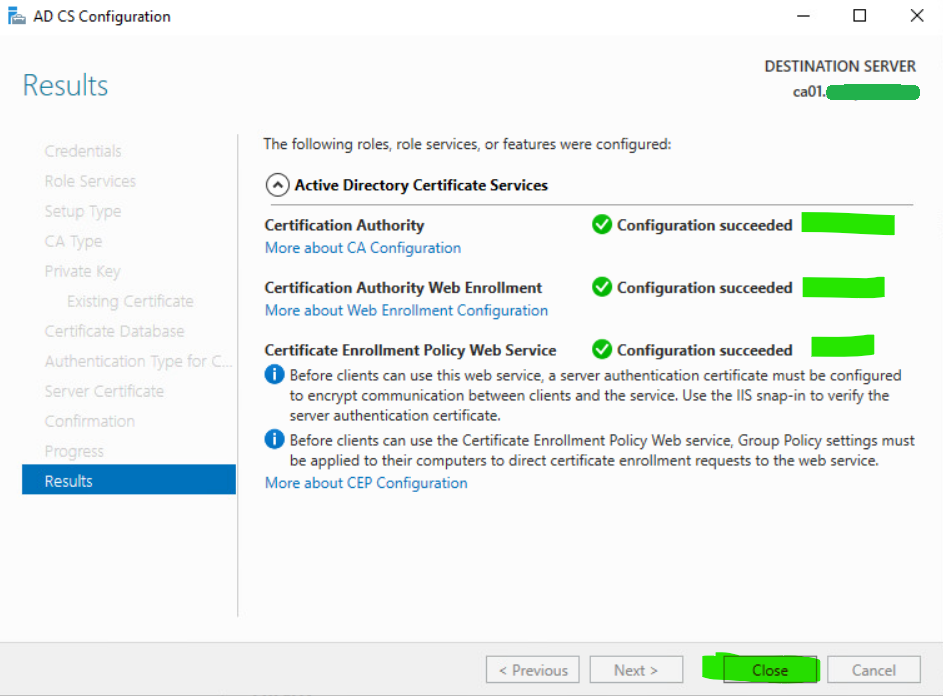
21. Review the details and click Configure to confirm.
22. When the configuration completes, review the results and click Close.
23. Click No to the additional role services message as we don’t need to add anymore more services.
24. Stop the CA service.
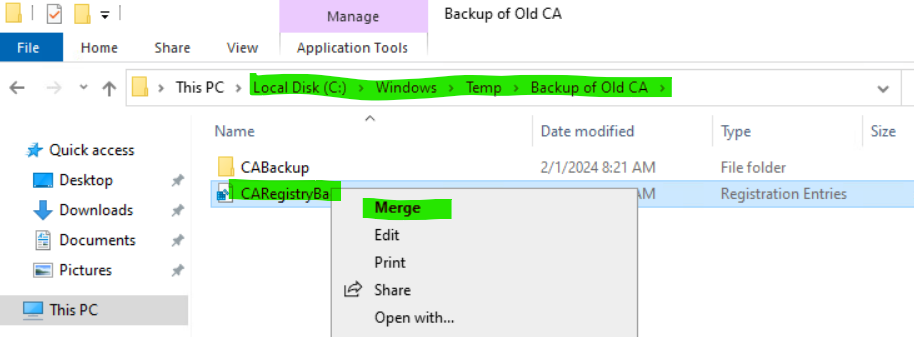
net stop certsvc25. Restore the registry settings by right-clicking the registry backup file copied from old server earlier under C:\Windows\Temp and selecting Merge.
26. Copy the CAPolicy.inf file (if present) into C:\Windows.
27. Import the database.
Restore-CARoleService -Path "C:\CABackup" -DatabaseOnly -Force
21. Start the CA service.
net start certsvcValidate New CA Server
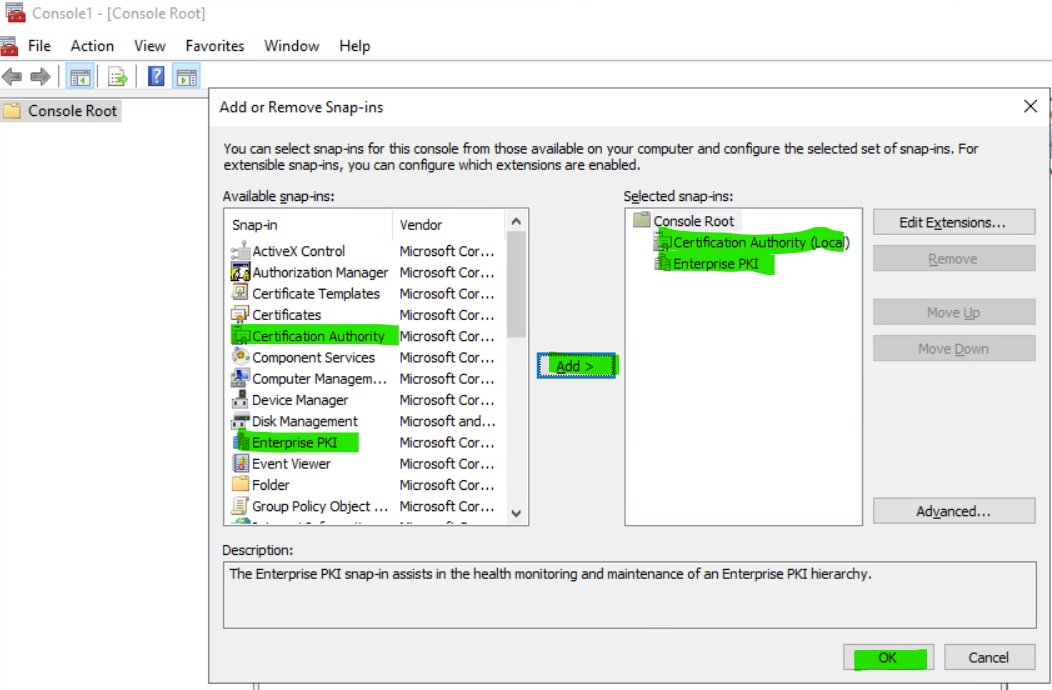
22. Test new CA by connecting to it, check the Enterprise PKI snap-in and issuing certificates.
To do this, execute mmc via command prompt/PowerShell, select File | Add/Remove Snap-in... and add Certification Authority and Enterprise PKI to the list of Selected snap-ins.
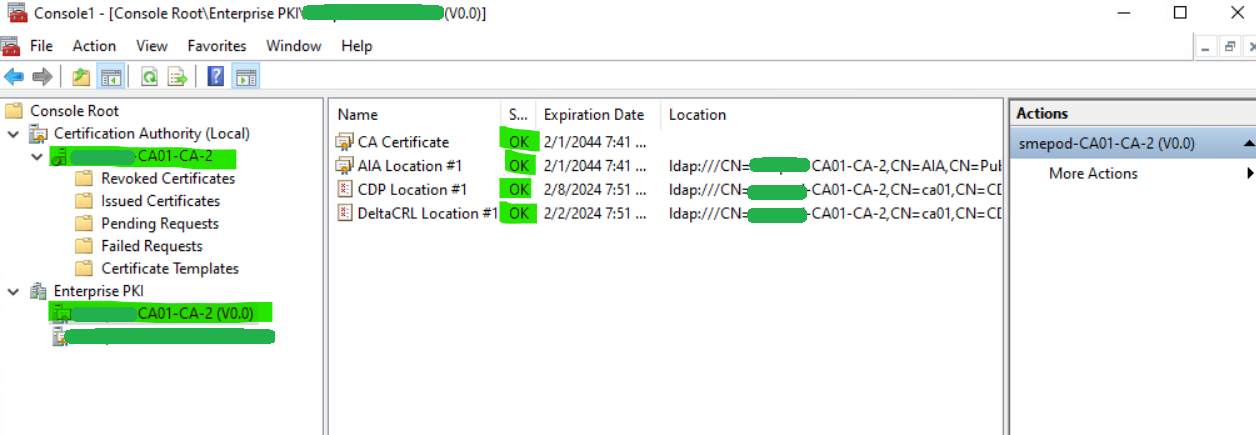
Verify that there are issued certificates if any were present on the old CA.
Also verify that Enterprise PKI CDP locations, certificate and CRLs have a status of OK.
Found this helpful? Comment below… ↓
2 thoughts on “Migrate Microsoft CA to New Server”
I am interesting in reading a migration article involving an offline Root CA with an AD issuing. I know when I did my migration from 2012 to 2019 it was a bear.
Hi Cory – we normally perform 2-tier migrations net new without migrating the databases. Meaning we setup brand new root and subordinate CAs with new names and end up with two CA instances until all templates have been migrated and new certificates have been issued from the new PKI infrastructure. Then we would decommission the old CA. Having said that, I can see a 2-tier DB migration scenario being a bit more complex. If we ever run into a real production scenario where we are forced to perform this kind of migration we will be sure to document it.