Welcome to part 3 of our Ansible for Beginners Tutorial. In part 2 of this series, we configured VS code as our Integrated Development Environment (IDE) tool to help with our Ansible coding.
Now that we have VS Code configured to connect to our Ubuntu Server, let’s continue with a simple Hello World playbook.
Ansible is a suite of software automation tools owned by Red Hat that enables infrastructure as code. It is open-source and includes software provisioning, configuration management, and application deployment functionality. Ansible can manage IT infrastructure environments from a centralized location using the popular SSH and WinRM protocols.
An Ansible playbook is a YAML-formatted script or configuration file that defines a set of tasks to be executed on remote hosts. Playbooks are used to automate device configuration, deployment, and orchestration tasks in an IT environment. They provide a way to organize and execute multiple Ansible tasks in a structured and repeatable manner.
In this Ansible Hello World playbook example, we will be creating an Ansible playbook that (1) prints ‘Hello World’ to the console, (2) runs a shell command against the server to get its IP address and display it on the console, (3) creates a file in the user’s home folder and (4) attempts to reboot the server, kamikaze style as we’ll be running these tasks against the server itself at localhost. We are in a lab environment after all. Right?
Right? Of course! Let’s have some fun…
Step 1
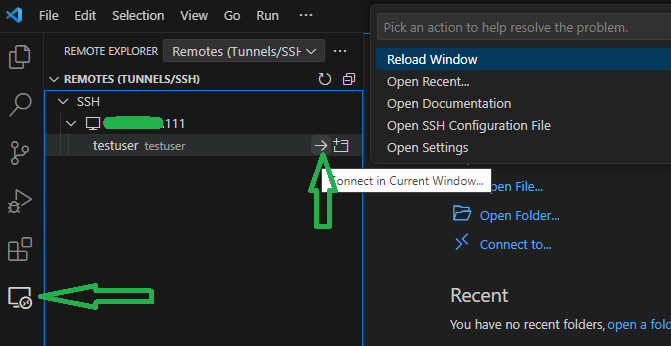
In VS Code, let’s connect to our Ubuntu Server’s user’s home folder. We’ll then select the Remote Explorer extension on the left and click the right arrow by the SSH entry we previously setup for our Ubuntu Server. Enter the password when prompted. Hit the refresh button just above if you do not see the SSH connection.
Step 2
Create a new folder by clicking the folder/+ icon. Name it ansible-tutorial.

Step 3
Create a new file and name it playbook.yml. To create a file right-click the ansible-tutorial folder, select New File… and name it.
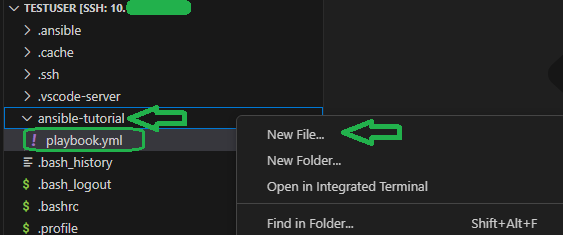
playbook.yml: this file will define a set of tasks and configurations that will be executed on one or more machines
Step 4
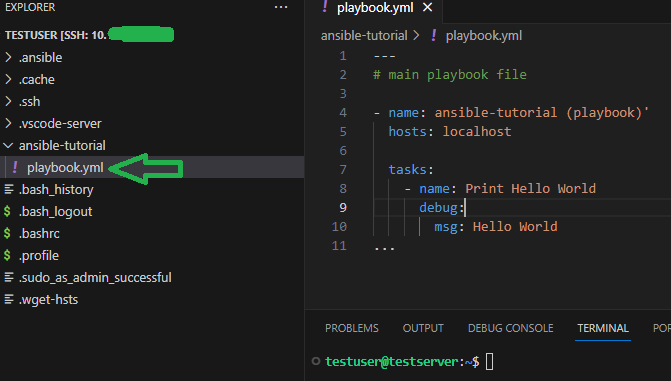
Let’s define our task. We want Ansible to print Hello World to the console. To print to console, we use the debug module. Hence, we place the following lines of code to our playbook.yml file and save it.
playbook.yml
---
# main playbook file
- name: ansible-tutorial (playbook)
  hosts: localhost
  tasks:
    - name: Print Hello World
      debug:
        msg: Hello World
...
Let’s break it down…
--- marks the beginning of our Yaml file.
# main playbook file denotes a comment line. Here we describe the file.
hosts: localhost refers to the host we want to run our automation against.
tasks: the tasks section is where we define the list of tasks that Ansible should execute on the target hosts.
name: debug: msg: the first task in our playbook is named Print Hello World and is of the module ansible.builtin.debug.
... marks the end of our Yaml file.
Step 5
To execute our playbook we type ansible-playbook and reference our playbook file.
ansible-playbook playbook.yml
Congratulations. We just successfully ran our first playbook. Let kick it up a notch…
Step 6
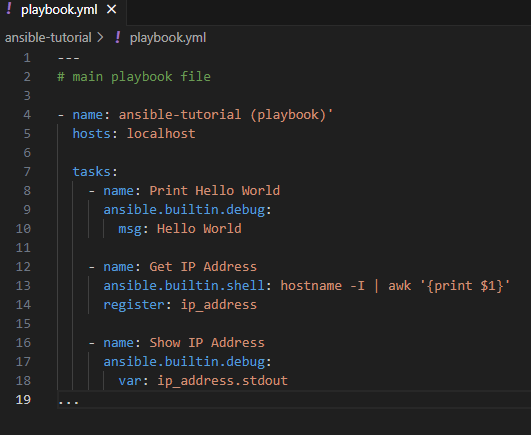
The second item on our task list is to run a shell command against our server at localhost and display its IP address. For this we can use the ansible.builtin.shell module along with ansible.builtin.debug. Let’s add our new code into the same playbook file.
playbook.yml
---
# main playbook file

- name: ansible-tutorial (playbook)
  hosts: localhost

  tasks:
    - name: Print Hello World
      ansible.builtin.debug:
        msg: Hello World

    - name: Get IP Address
      ansible.builtin.shell: hostname -I | awk '{print $1}'
      register: ip_address

    - name: Show IP Address
      ansible.builtin.debug:
        var: ip_address.stdout
...
Note: we notice in step 4 that we specified the module collections keyword debug instead of its fully qualified collection name (fqcn) ansible.builtin.debug. It is a best practice in all cases to use the fqcn instead of the keyword to avoid conflicting with other collections that may have the same module name.
Using Ansible module ansible.builtin.shell we are able to execute shell commands against a Linux server. In order to store the output of this command in a variable, we use the register command and print it to the console using ansible.builtin.debug.
Step 6
Once again, to execute our playbook we type ansible-playbook and specify the playbook file.
ansible-playbook playbook.yml
Step 7
Our third task calls for creating a file in the user’s home folder. Let’s get to it and find the right module…one one thousand, two one thousand, three one thousand, you guessed it! ansible.builtin.file. But before we proceed, let’s introduce tags. With the use of tags we can run certain parts of a playbook while ignoring others. As our playbook is getting congested, we will add our file creation code, tag the task and call the ansible playbook with the tag, ignoring all other tasks. That was a mouthful…
playbook.yml
---
# main playbook file

- name: ansible-tutorial (playbook)
  hosts: localhost

  tasks:
    - name: Print Hello World
      ansible.builtin.debug:
        msg: Hello World

    - name: Get IP Address
      ansible.builtin.shell: hostname -I | awk '{print $1}'
      register: ip_address

    - name: Show IP Address
      ansible.builtin.debug:
        var: ip_address.stdout

    - name: Create file in user's home folder
      ansible.builtin.file:
        path: ~/hello_world.txt
        state: touch
      tags:
        - create_file
...
To execute the last task we just created we run our playbook and specify the –tags switch.
ansible-playbook playbook.yml --tags create_file
Once we run the playbook with the create_file tag we quickly see a new file appear in the user’s home folder named hello_world.txt. Well done!
Step 8
Now, onto our fourth and last task. Reboot the server kamikaze style. Let’s go…
playbook.yml
---
# main playbook file
- name: ansible-tutorial (playbook)
hosts: localhost
tasks:
- name: Print Hello World
ansible.builtin.debug:
msg: Hello World
- name: Get IP Address
ansible.builtin.shell: hostname -I | awk '{print $1}'
register: ip_address
- name: Show IP Address
ansible.builtin.debug:
var: ip_address.stdout
- name: Create file in user's home folder
ansible.builtin.file:
path: ~/hello_world.txt
state: touch
tags:
- create_file
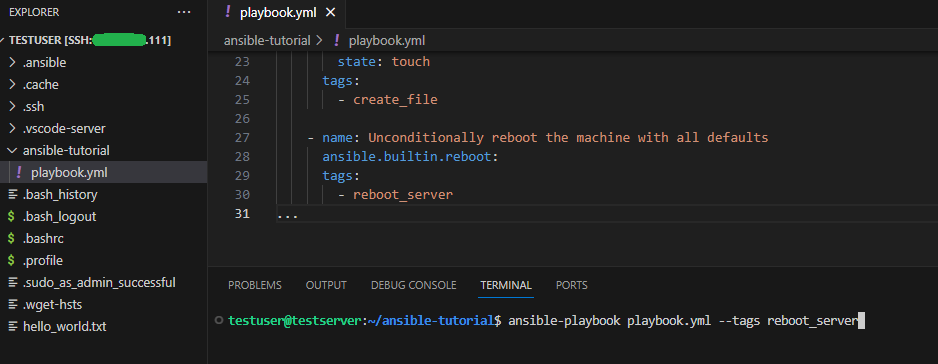
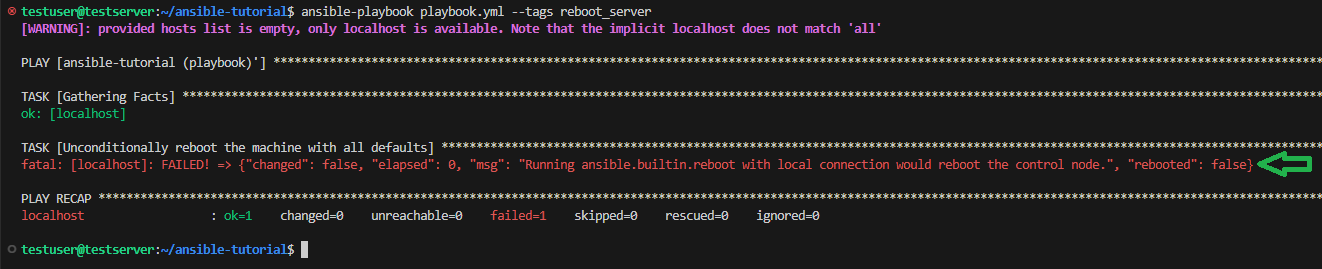
- name: Unconditionally reboot the machine with all defaults
ansible.builtin.reboot:
tags:
- reboot_server
...Now, some may argue this is the dumbest thing we could do. They are not wrong! Save all your work, run the following command. Actually, not before this joke:
What did the kamikaze flight instructor tell his students?
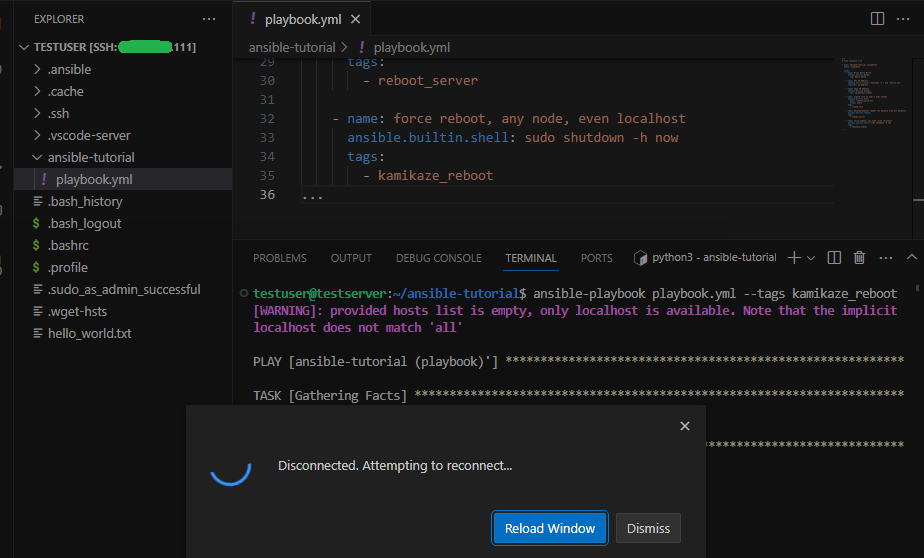
- name: force reboot, any node, even localhost
      ansible.builtin.shell: sudo reboot -h now
      tags:
        - kamikaze_reboot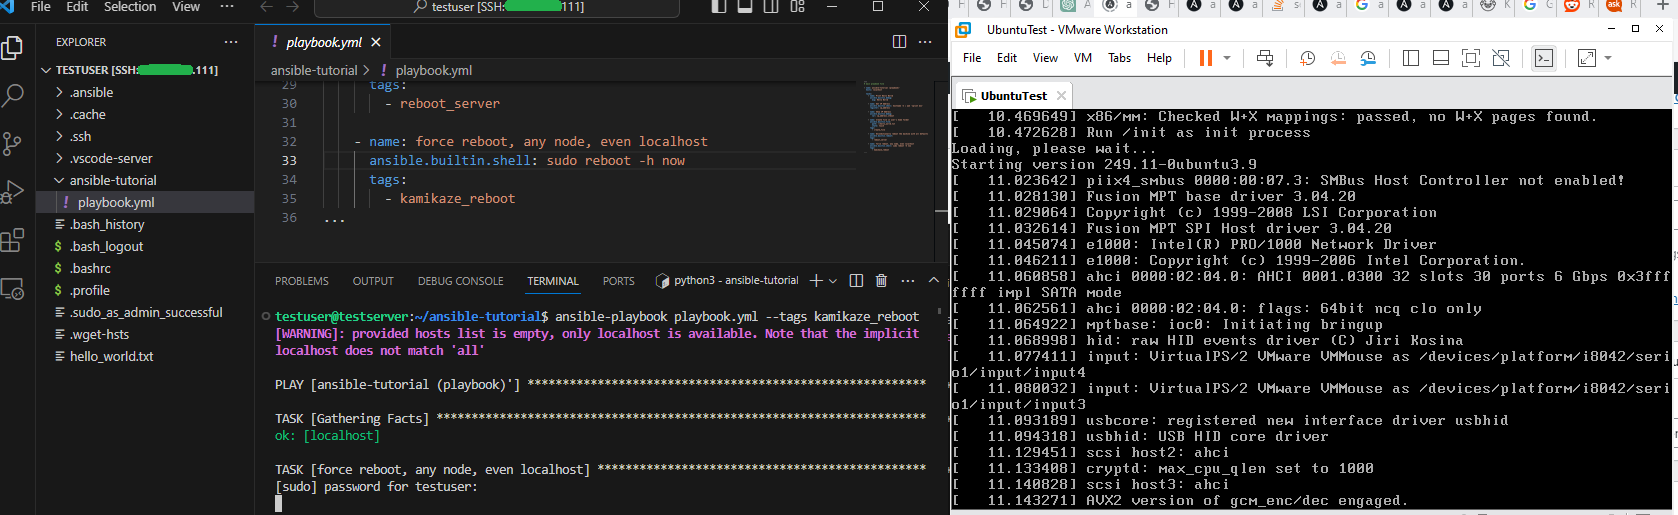
Found this part of the tutorial helpful? Comment below… ↓