This is a basic walkthrough on how to install Microsoft CA on Windows Server core versions with no GUI. Microsoft’s Active Directory Certificate Services (AD CS) allows organizations to build a public key infrastructure (PKI) and provide public key cryptography, digital certificates, and digital signature capabilities. In this walkthrough, we install an Enterprise Root Certificate Authority on server core. That is, a single node online issuing root CA with no GUI and no subordinate CA servers. Let’s begin…
Step 1 – Install the AD Certificate Services (AD CS) Role
To add the AD Certificate Services role on our core server, we log into our core server ensuring we are in a powershell command prompt (not cmd) and then we add the CA role using the Install-WindowsFeature command.
powershell
Install-WindowsFeature AD-Certificate
Step 2 – Configure the role as an Enterprise Certification Authority
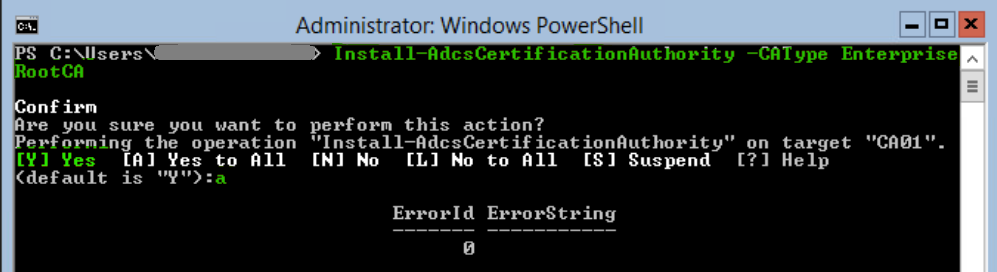
To configure the server as an enterprise certificate authority we use the Install-AdcsCertificationAuthority command. Please review the notes in blue below as there are some important settings that can and should be specified here which will be different for each environment.
To build the EnterpriseRootCA with the default options run the following command:
Install-AdcsCertificationAuthority -CAType EnterpriseRootCAType A and hit Enter to confirm.
This will install an online Enterprise Root CA server using the default configuration. To customize the CA options, see the Install-AdcsCertificateAuthority documentation. There are some recommended options such as setting the Hash Algorithm to SHA256, -HashAlgorithmName SHA256. Validity period of the root CA cert can also be changed. For example, -ValidityPeriod Years -ValidityPeriodUnits 20. So one scenario may call for the following but we need to check the requirements for each environment individually. Install-AdcsCertificationAuthority -CAType EnterpriseRootCA -HashAlgorithmName SHA256 -ValidityPeriod Years -ValidityPeriodUnits 20
Step 3 – Confirm that the CA is online and available
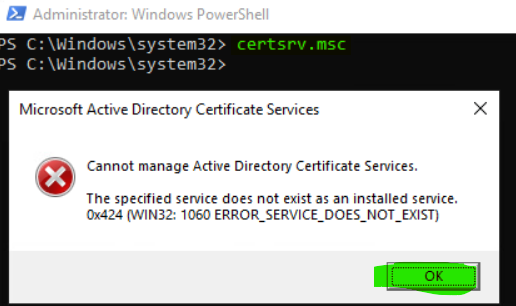
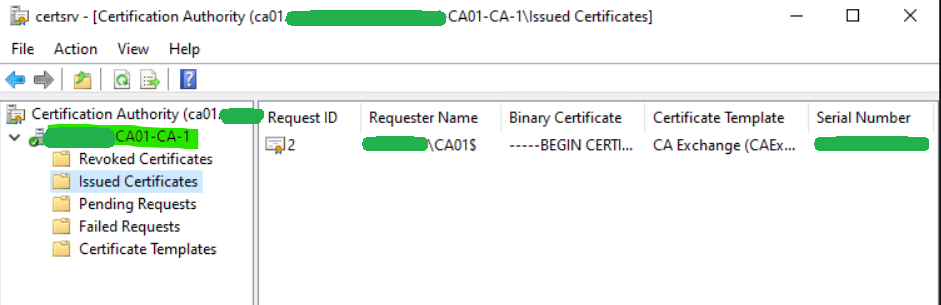
To verify that the CA is online, hop onto another machine on the domain and open the Certification Authority console. That is, type certsrv.msc in command prompt and click OK if you see an error.
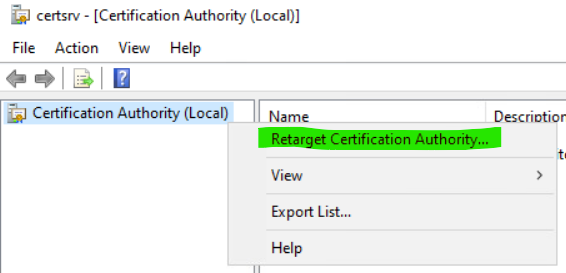
Retarget to the new CA by right-clicking Certification Authority (Local) and then selecting Retarget Certification Authority…
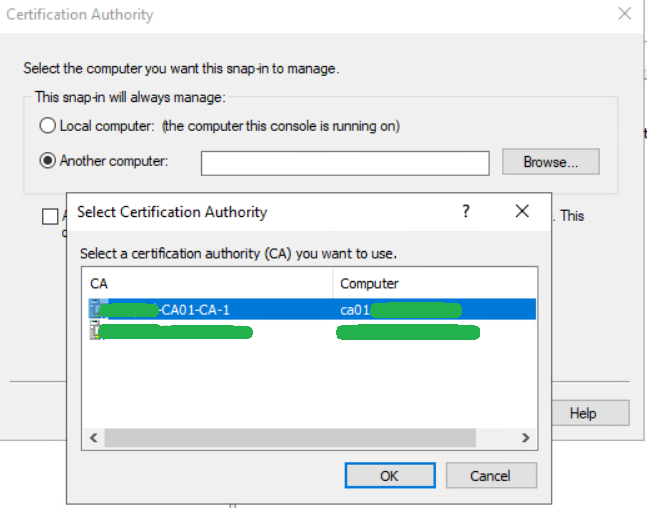
Select Another computer, click Browse…, select the newly built CA, click OK and then press Finish.
We see that we now have a new online CA functional in our domain.
Step 4 – Adding Other CA Services
To add additional CA services to the CA we can further use PowerShell.
Let’s get all available install commands under the ADCS role.
get-command -module adcs* -name install*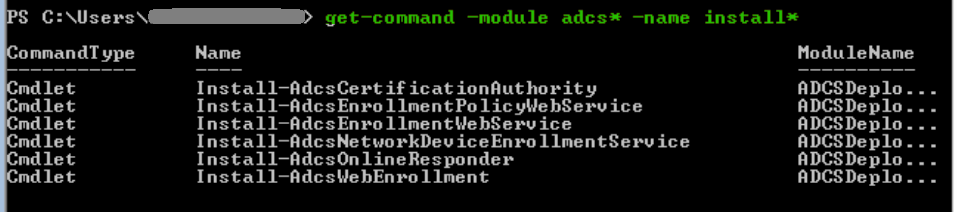
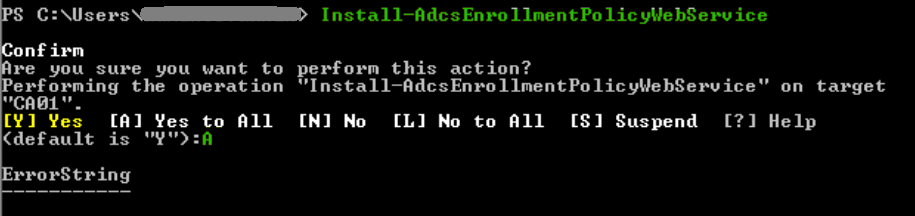
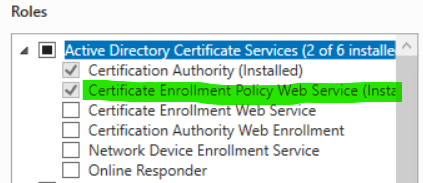
To add a service, we first install the Windows feature and then install the service. For example, to enable Certificate Enrollment Policy Web Service.
Install-WindowsFeature ADCS-Enroll-Web-Pol
Install-AdcsEnrollmentPolicyWebService
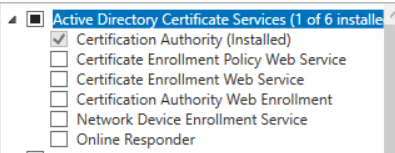
And if we check remotely through Server Manager via the GUI, the service is now installed.
For a list of all Windows feature names, run the following command.
get-windowsfeature adcs*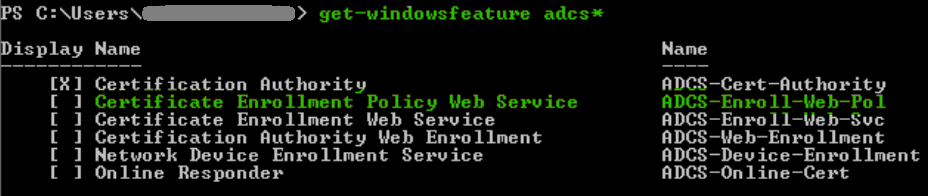
And to pair up the different CA services…
Certification Authority
Install-WindowsFeature ADCS-Cert-Authority
Install-AdcsCertificationAuthority
Certificate Enrollment Policy Web Service:
Install-WindowsFeature ADCS-Enroll-Web-Pol
Install-AdcsEnrollmentPolicyWebService
Certificate Enrollment Web Service:
Install-WindowsFeature ADCS-Enroll-Web-Svc
Install-AdcsEnrollmentWebService
Certificate Authority Web Enrollment:
Install-WindowsFeature ADCS-Web-Enrollment
Install-AdcsWebEnrollment
Network Device Enrollment Service:
Install-WindowsFeature ADCS-Device-Enrollment
Install-AdcsNetworkDeviceEnrollmentService
Online Responder:
Install-AdcsOnlineResponder
Install-WindowsFeature ADCS-Online-Cert
Let’s also remember that some aspects of a core server can be managed via Server Manager and other tools remotely. Open ServerManager on another server, select Manage and then click Add Servers to find the server core host and add it to the management console. It can then be managed from there.

That’ll do it for this one. Good luck and comment below if this helped you out! ↓