As organizations begin to harden certificate templates on their internal Microsoft CA authorities we are beginning to see more environments where Microsoft CA’s web enrollment option is no longer available for requesting certificates. In this post we review step-by-step how to submit CSR to Microsoft CA using certreq when web enrollment is no longer available by issuing the command certreq -submit -attrib “CertificateTemplate:WebServer” CSRFileName.req CertFileName.cer. Worry not, it is a 3-step walk in the park.
Quick Steps
- Generate CSR. It will be required in step 3. If you are not familiar with the CSR generation process see Generate CSR on Windows Server.
- Right-click Start | select Windows PowerShell (Admin) to launch PowerShell as administrator.
- Execute the following certreq command:
certreq -submit -attrib "CertificateTemplate:CertificateTemplateName" CSRFileName.req CertFileName.cerCertificateTemplateName: Substitute with an appropriate Certificate Template name. This is the name of the certificate template without any spaces. It can be found on the CA server by launching Certificate Templates MMC snap-in or certtmpl.msc via command prompt or PowerShell. For example, “WebServer”. If unsure, check with a PKI administrator.
CSRFileName: Substitute with an appropriate CSR file name. This is the name of the CSR (or .req) file generated in step 1.
CertFileName: This is the name of the resulting certificate file created by the certreq command. If this file cannot be located after certreq command execution, it may be in c:\windows\system32 as it is likely the current working directory.
How to Submit CSR to Microsoft CA using CertReq – Full Procedure
Where V3 templates are utilized and requests cannot be made via Microsoft CA’s web enrollment, a certificate request must be submitted using an alternate method. Here is how to to submit a Certificate Signing Request (CSR) to a Microsoft CA using CertReq.
Before we can submit a request using CertReq this way, we need to generate our Certificate Signing Request (CSR) file. To generate a CSR on a Microsoft Windows machine via MMC console see Generate CSR on Windows Server. Once a CSR file is available we can proceed with the next steps.
Step 1 – Generate a CSR
Generate a Certificate Signing Request (CSR). It will be required in step 3. If you are not familiar with the CSR generation process see Generate CSR on Windows Server.
Step 2 – Launch command prompt as administrator
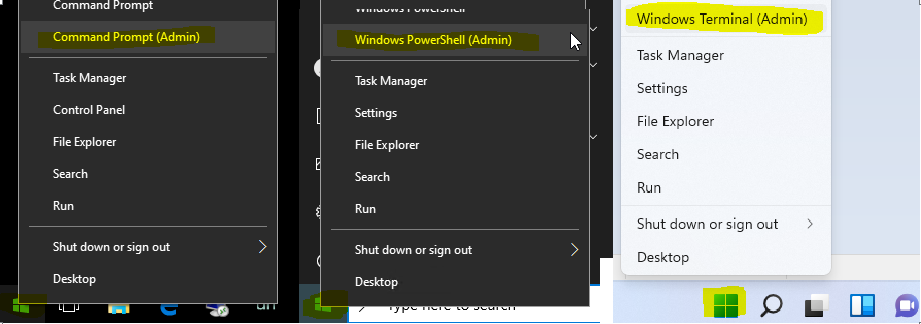
Launch Windows command prompt as administrator. That is, Right-Click the Start button and then select Command Prompt (Admin), Windows PowerShell (Admin), or Windows Terminal (Admin), depending on the version of Windows.
Step 3 – Execute certreq command
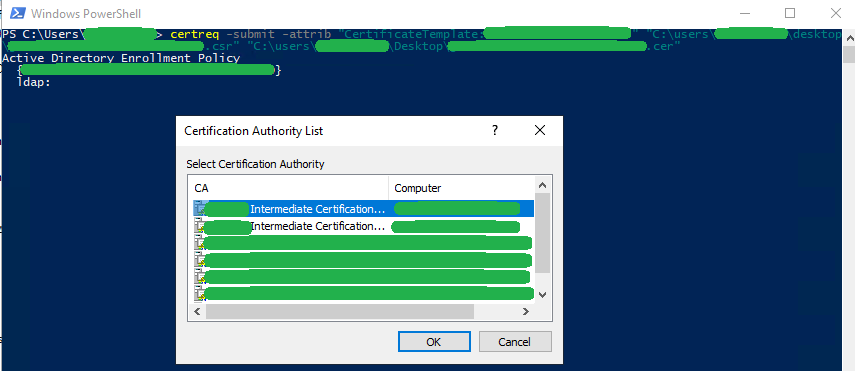
Execute the following certreq command via command prompt:
certreq -submit -attrib "CertificateTemplate:CertificateTemplateName" CSRFileName.req CertFileName.cerCertificateTemplateName: Substitute with an appropriate Certificate Template name. This is the name of the certificate template without any spaces. It can be found on the CA server by launching Certificate Templates MMC snap-in or certtmpl.msc via command prompt or PowerShell. For example, “WebServer”. If unsure, check with a PKI administrator.
CSRFileName: Substitute with an appropriate CSR file name. This is the name of the CSR (or .req) file generated in step 1.
CertFileName: This is the name of the resulting certificate file created by the certreq command. If this file cannot be located after certreq command execution, it may be in c:\windows\system32 as is likely the current working directory.
Then select the appropriate certificate authority from the popup windows to proceed.

Step 4 – Validate the certificate
Locate the resultant .cer certificate file and verify its validity.
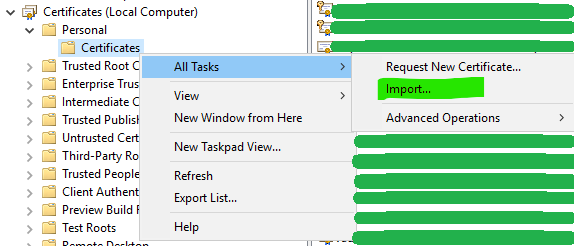
Import it to the certificate store of the machine that generated the CSR by launching Certificates snap-in via MMC, expanding Personal | Certificates , right-clicking the Certificates node, and selecting All Tasks | Import.
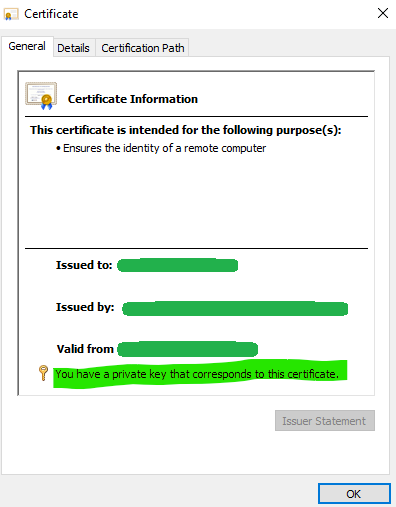
Verify to ensure the imported certificate has its private key.
Another way to request a certificate from Microsoft CA is directly via Active Directory Enrollment Policy. This process skips the requirement for a CSR requests a certificate directly from the CA.
How to Request Certificate from Microsoft CA using Active Directory Enrollment Policy
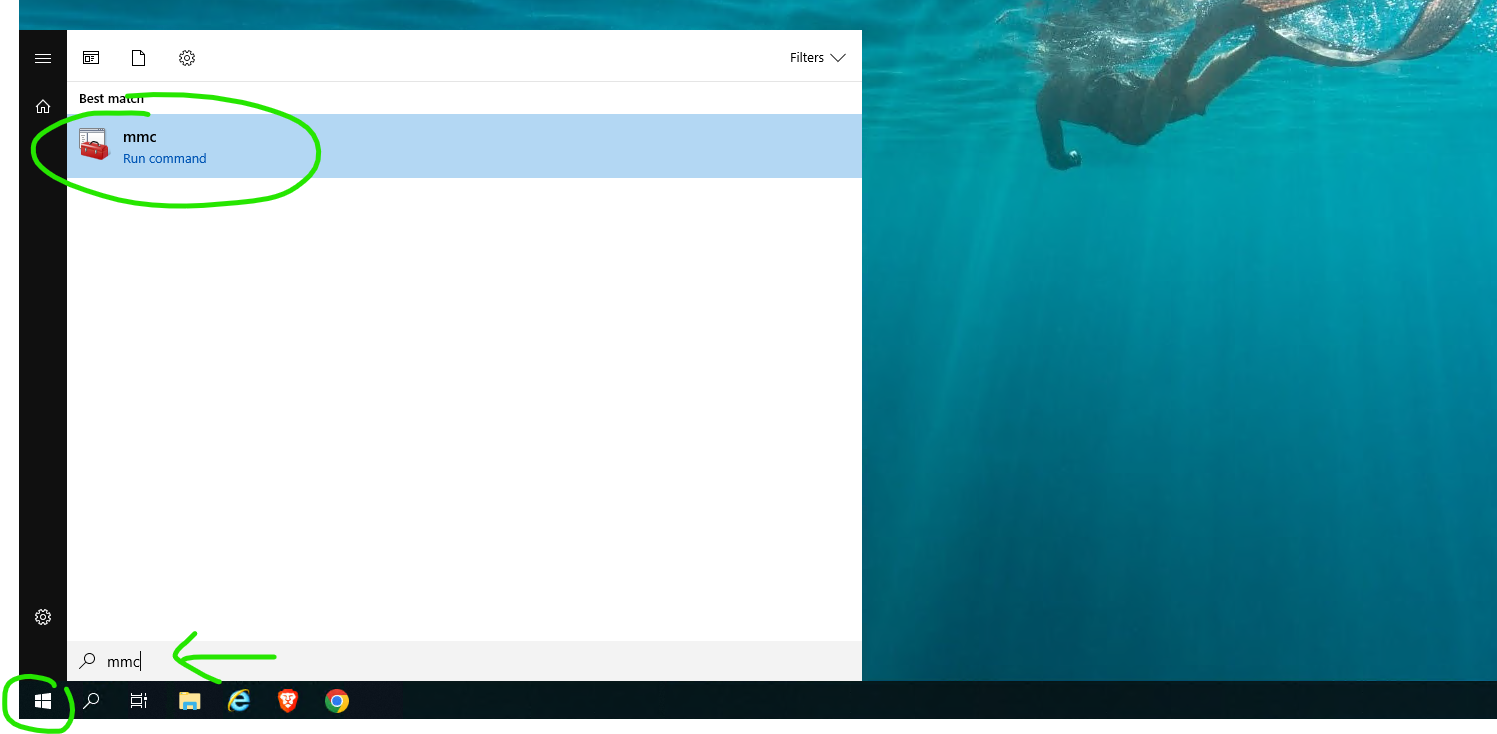
1. Launch MMC Console by clicking Start and then typing “mmc” and hitting Enter. Alternatively, type mmc in PowerShell or Command Prompt window and hit Enter.
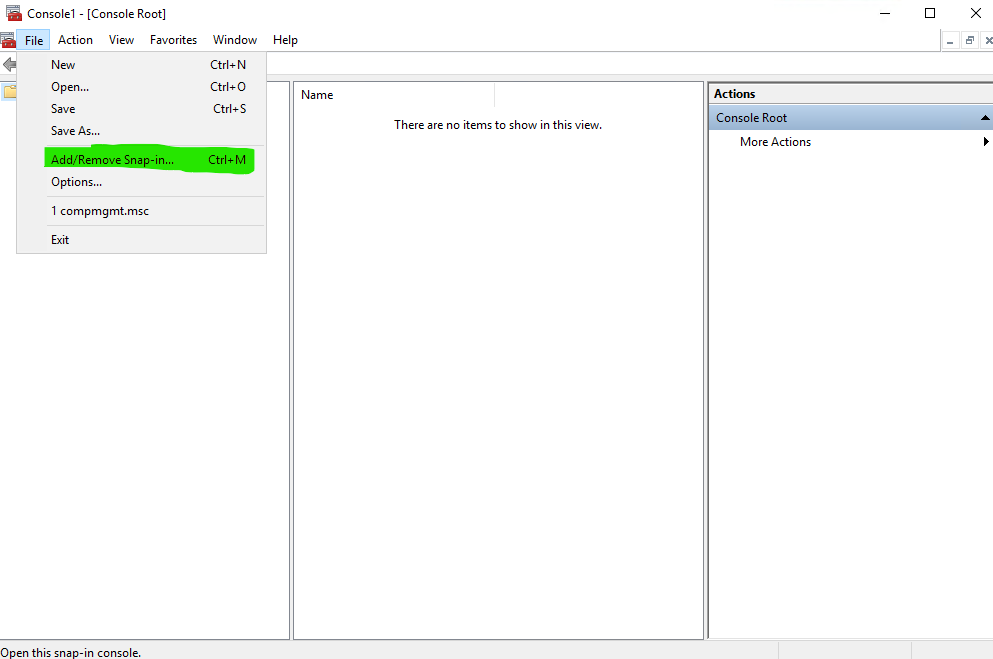
2. Click File and then select Add/Remove Snap-in… or press Ctrl+M.
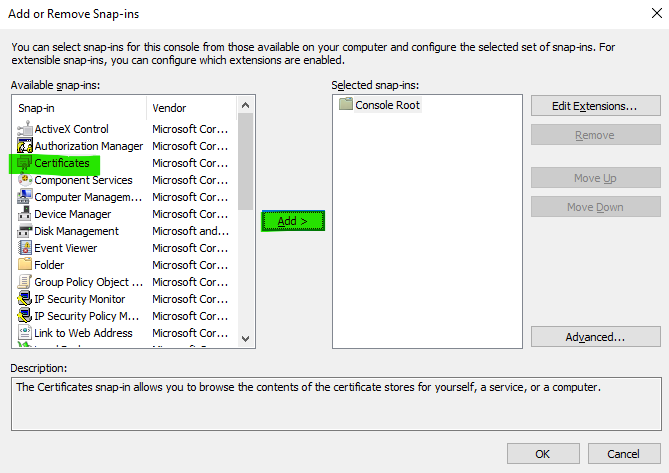
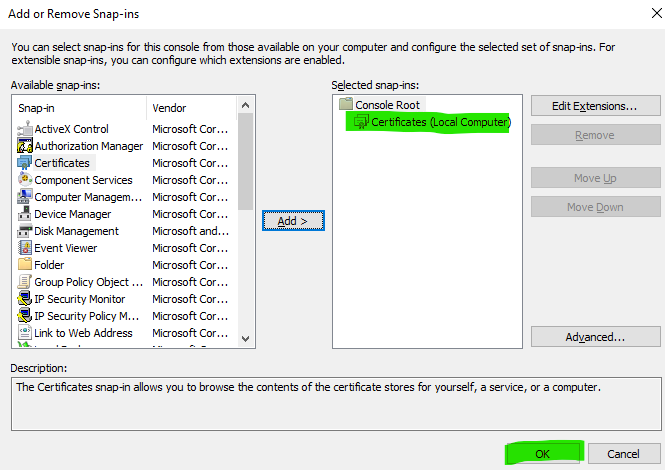
3. From the Available snap-ins list, select Certificates and then click Add.
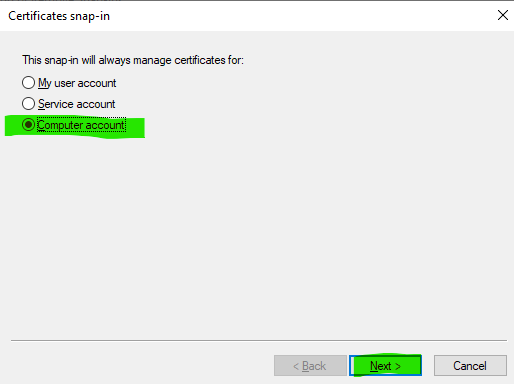
4. Select Computer account and click Next.
5. Leave the default option (Local computer) and click Finish.

6. Click OK to add the snap-in.
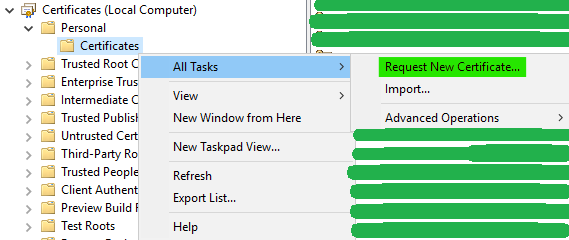
7. Expand the Certificates (Local Computer) node, right-click Personal, select All Tasks | Request New Certificate…
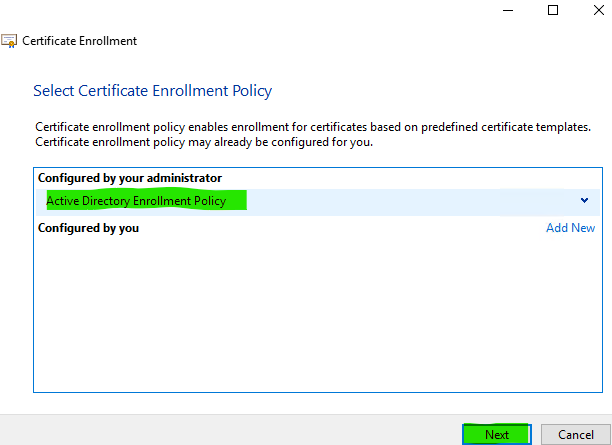
8. Click Next.

9. Ensure Active Directory Enrollment Policy is selected and then click Next.
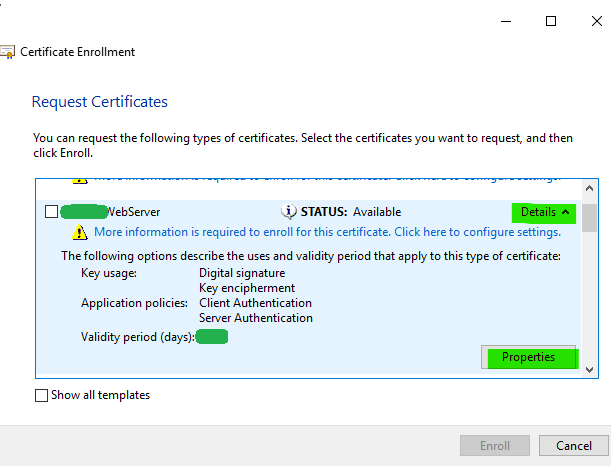
10. Locate the appropriate certificate template, expand Details (down-arrow) and then select Properties to set the request’s properties like common name, subject alternative names, private key length and other options. Click OK and Enroll when done.
If this helped you in any way, comment below! ↓